

Well I decided I wanted to make a “build” thread of sorts to help showcase what OTE Design and Fabrication can do for you. Tom has done a lot of fab work on my car, and I have put together a little timeline of what we started with in November of 2007 to what was finished in July of 2008. Due to putfile.com going down we lost a good number of pics so there will be some holes here and there, but you will get the picture.
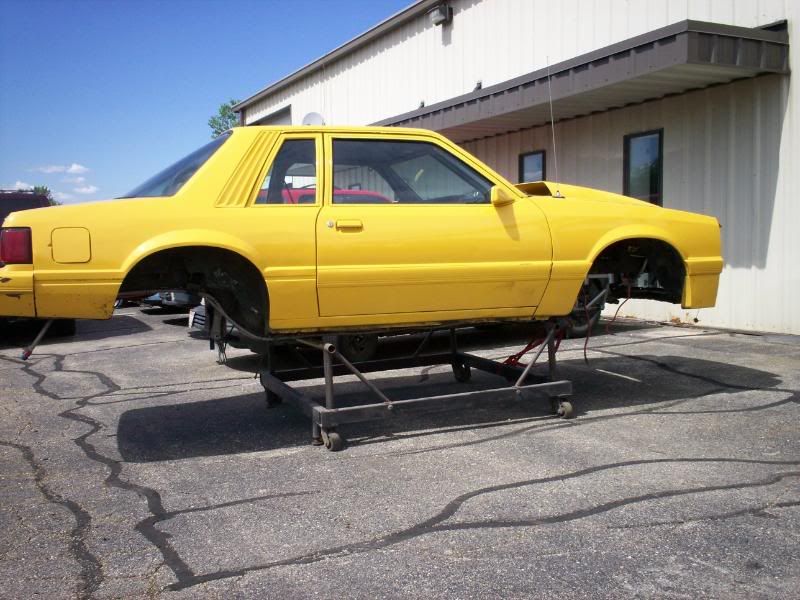
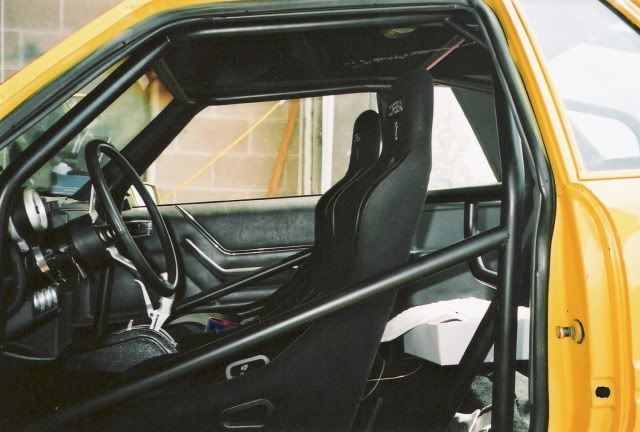
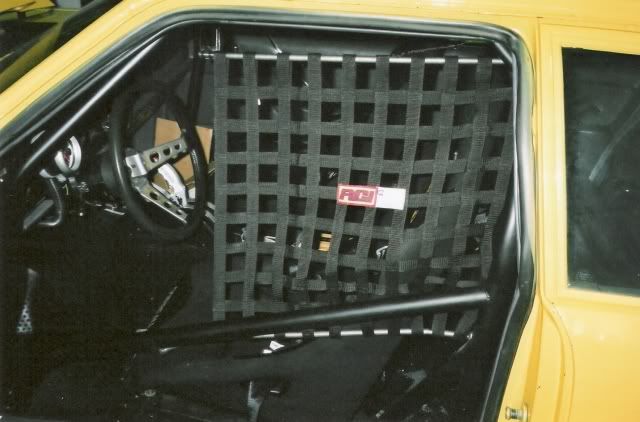
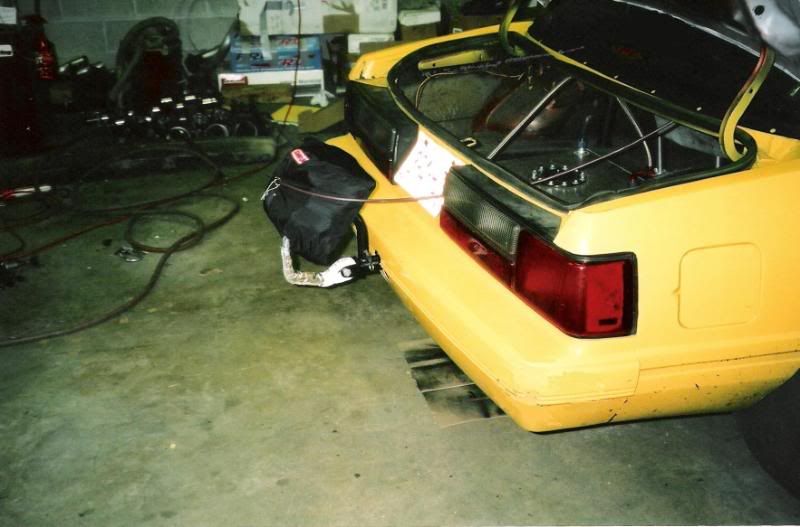
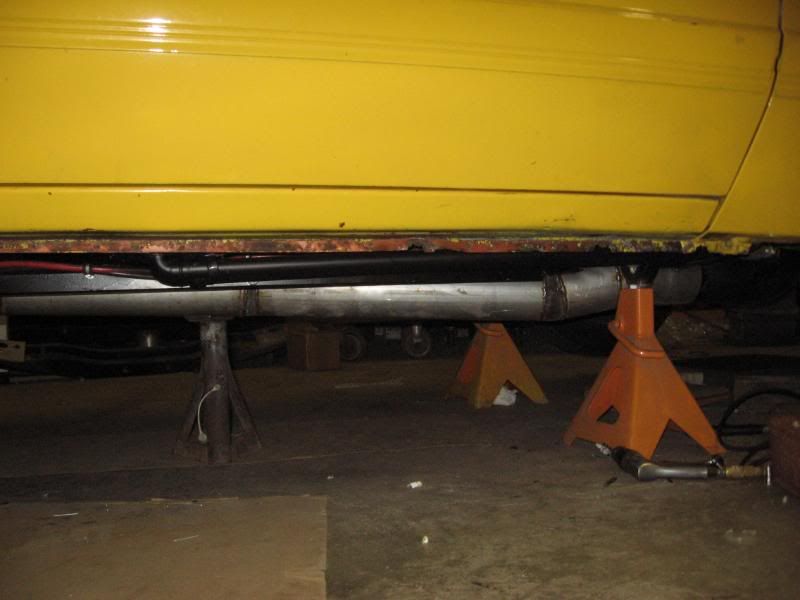
Here is what we started with in late 07. I wanted to move into a new poweradder because I was less than thrilled with the blowers I had had, and I knew I wanted to mini-tub the car and set it on some MT 325/50/R15s. I had already had the cage and chute done by Tom in previous years so at least a few things were done.
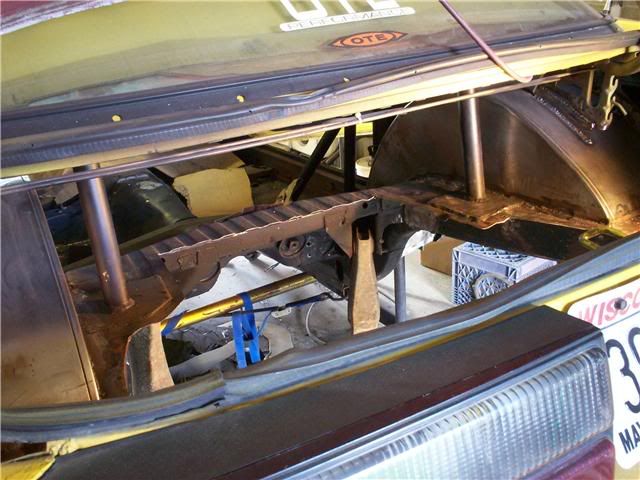
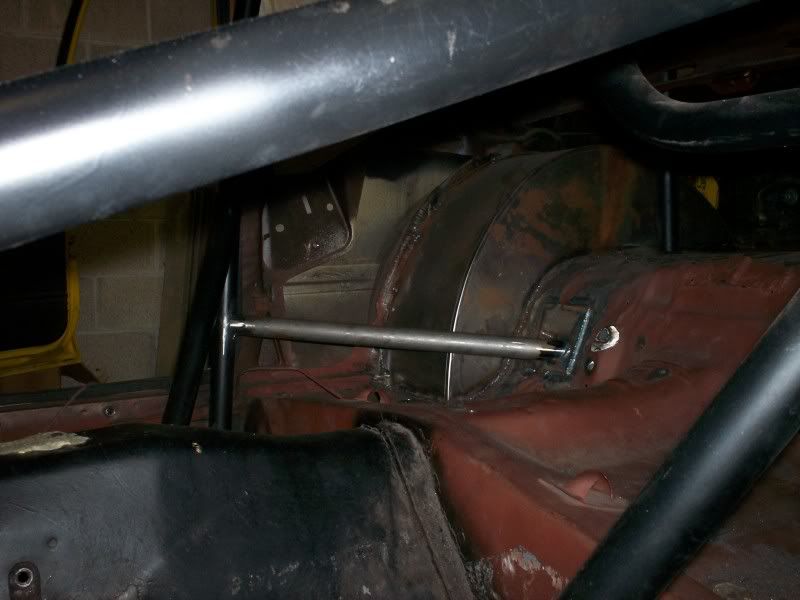
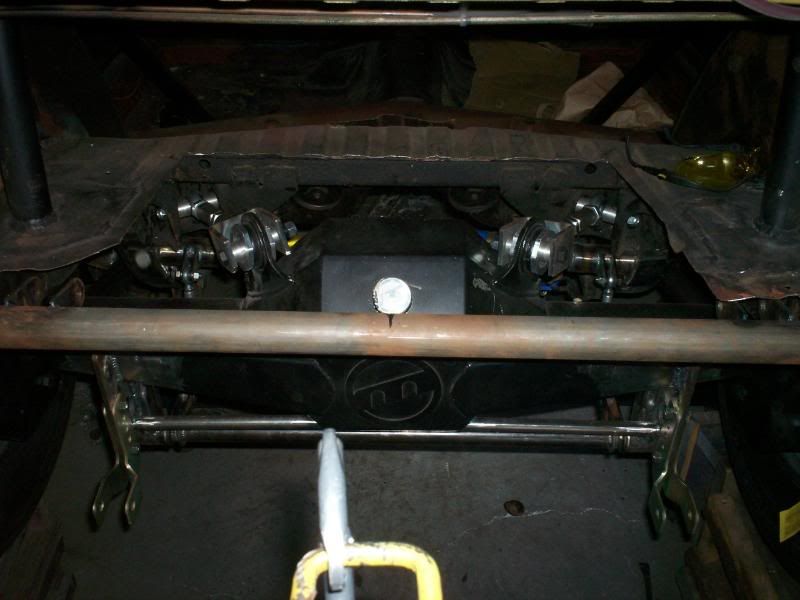
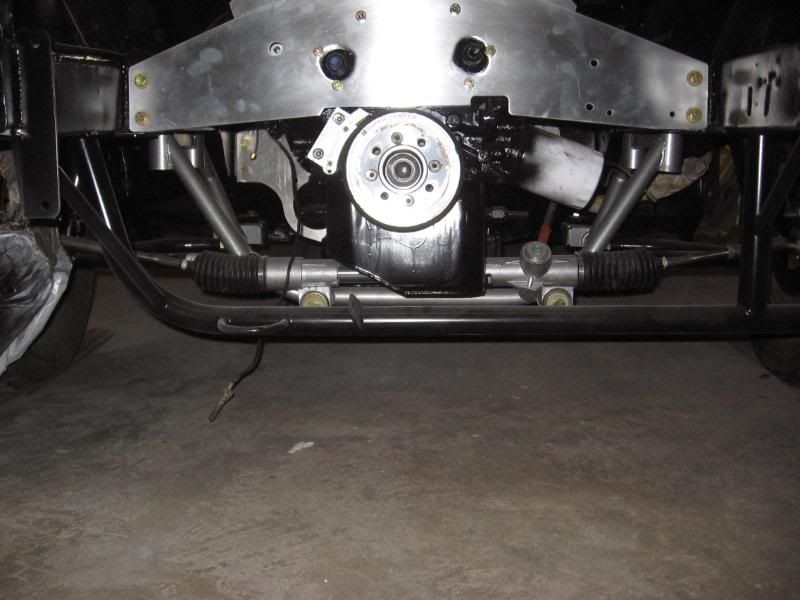
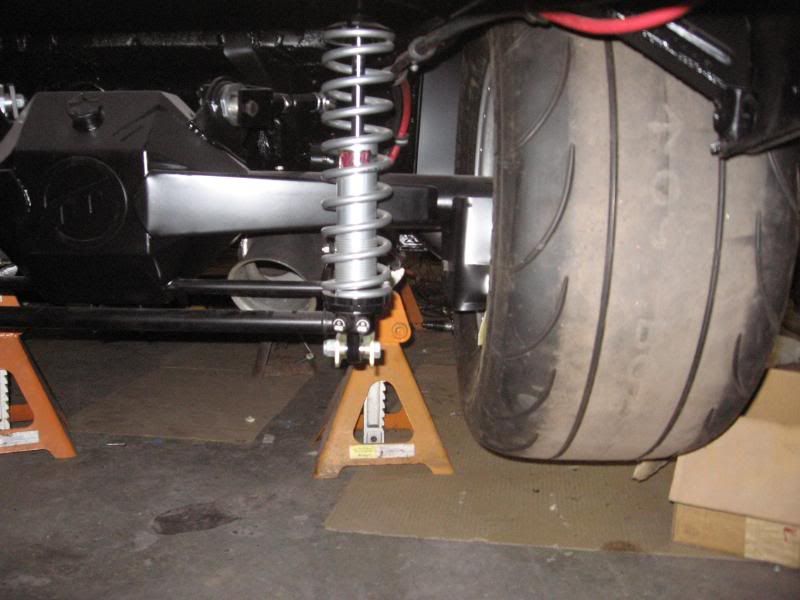
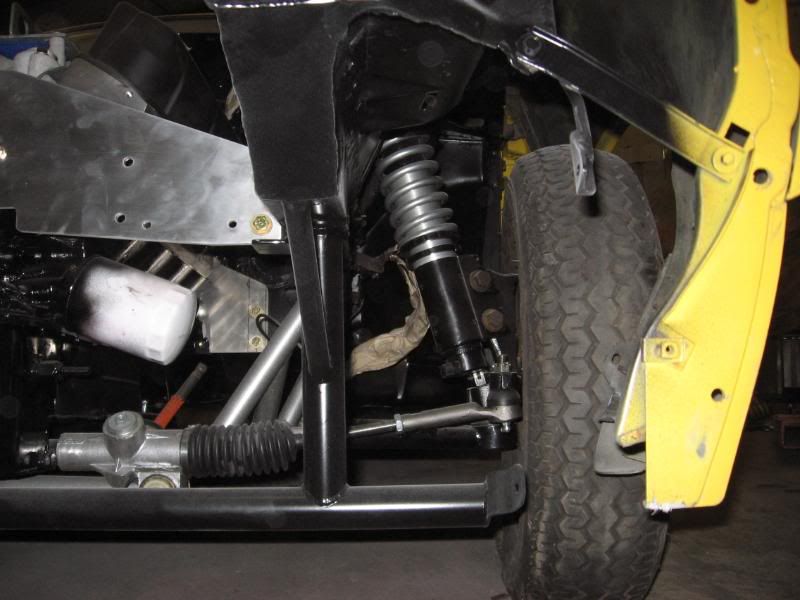
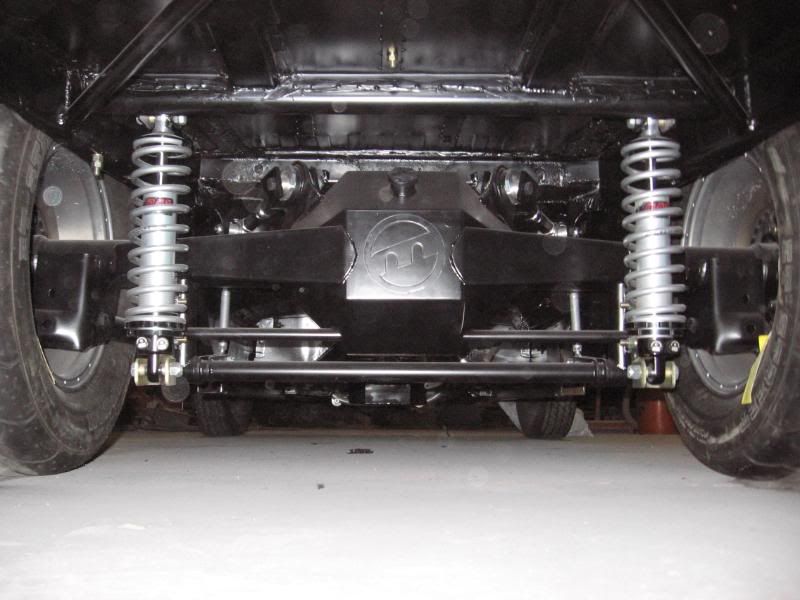
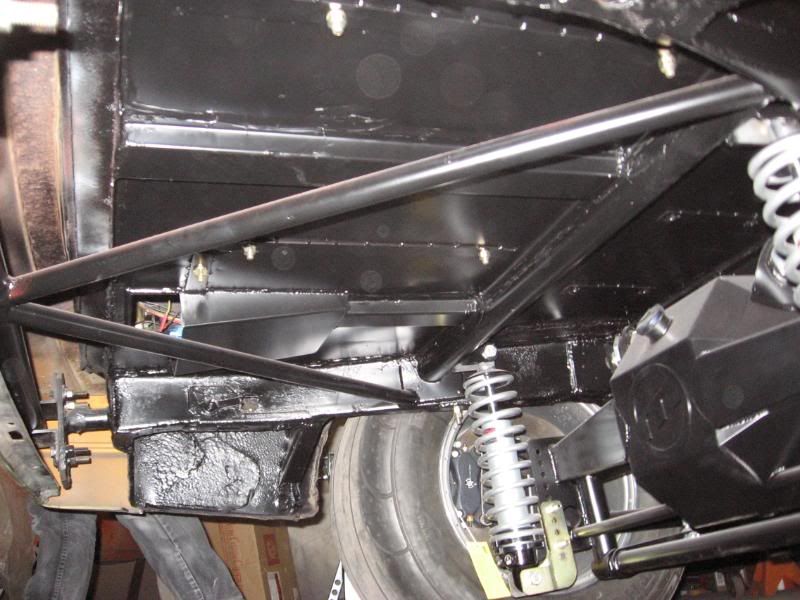
We decided first to start tackling the mini tubs and rear suspension. A lot of the mini tub progress pics were lost, but I have a lot of when the suspension was first going together.
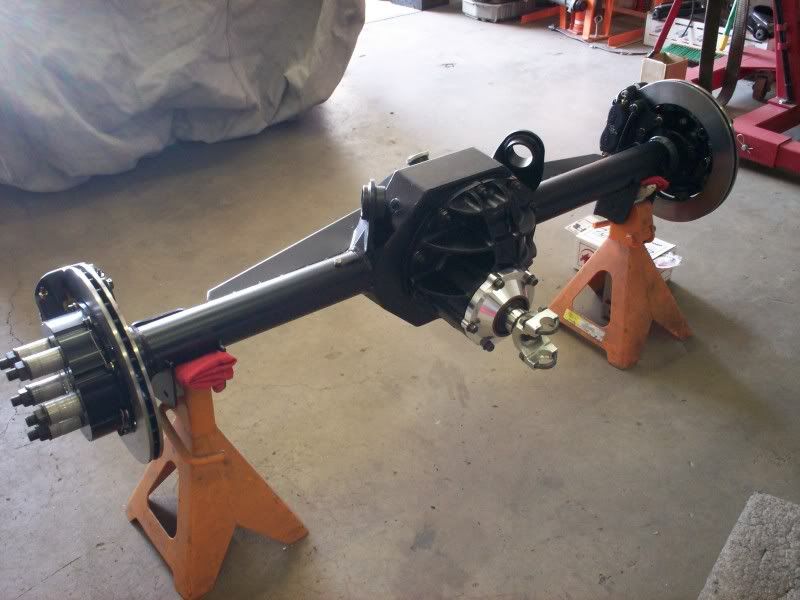
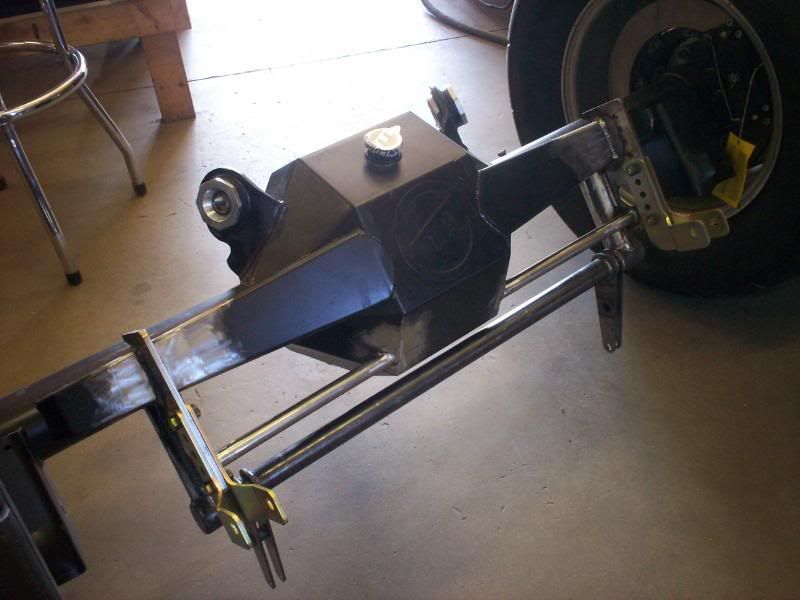
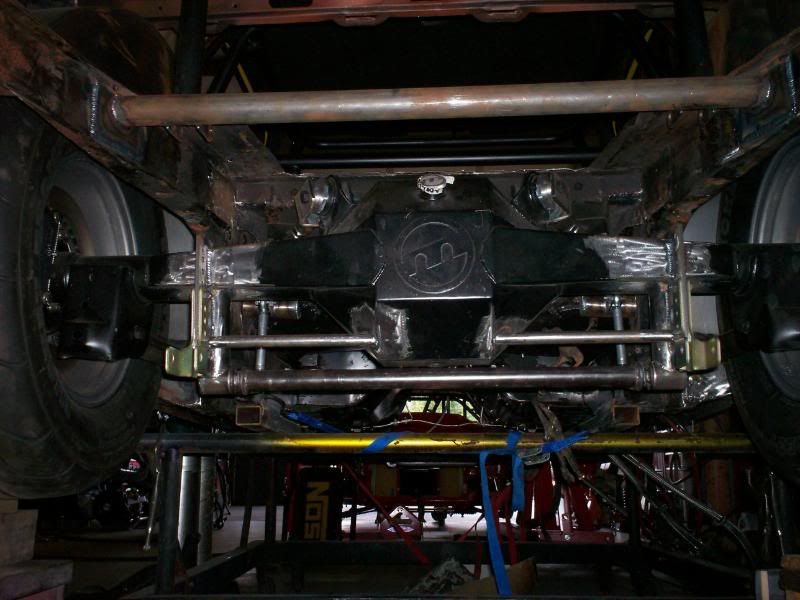
For the rear axle I went with an M9 narrowed 2.25” on both sides with 40 spline axles and a bunch of other goodies. The rear suspension consists of all Wolfe double adjustable arms and QA1 double adjustable coilovers.
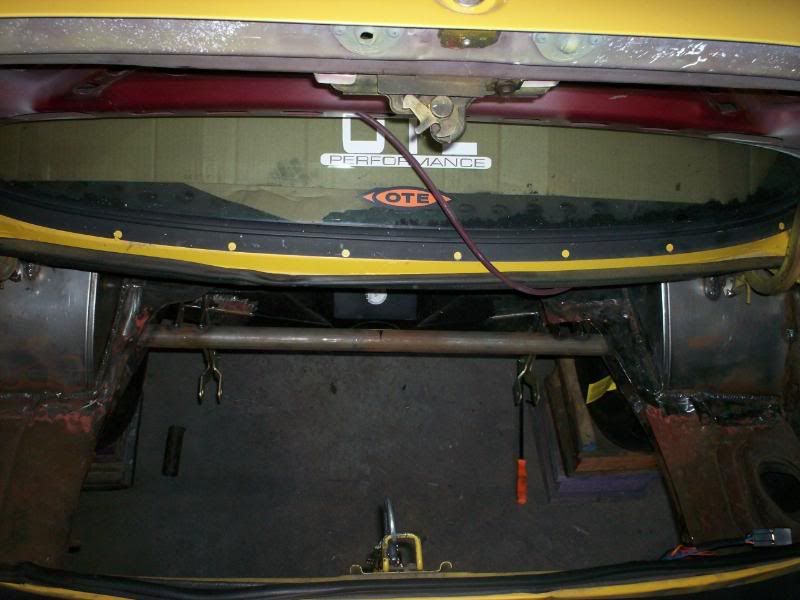
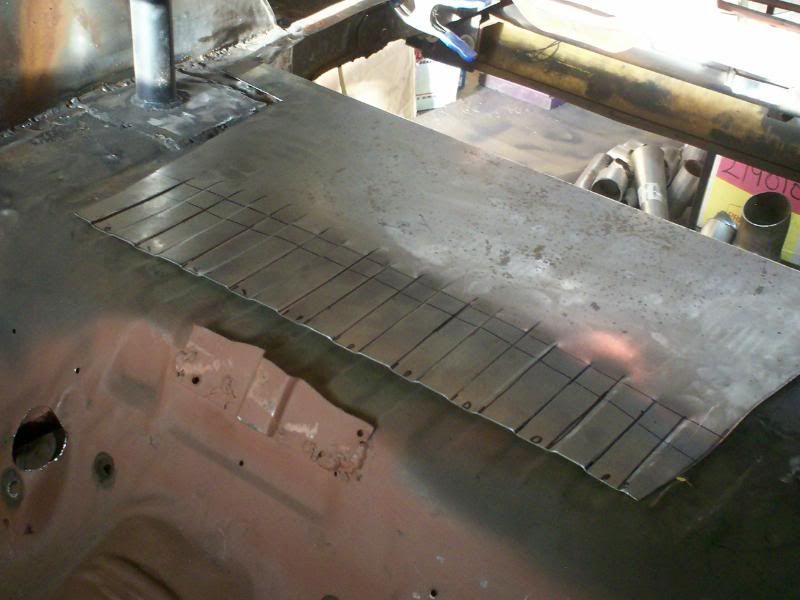
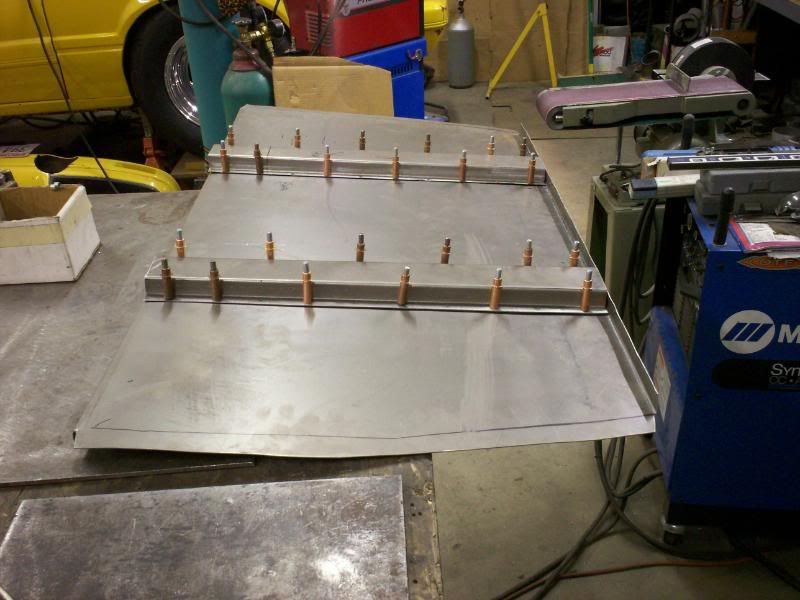
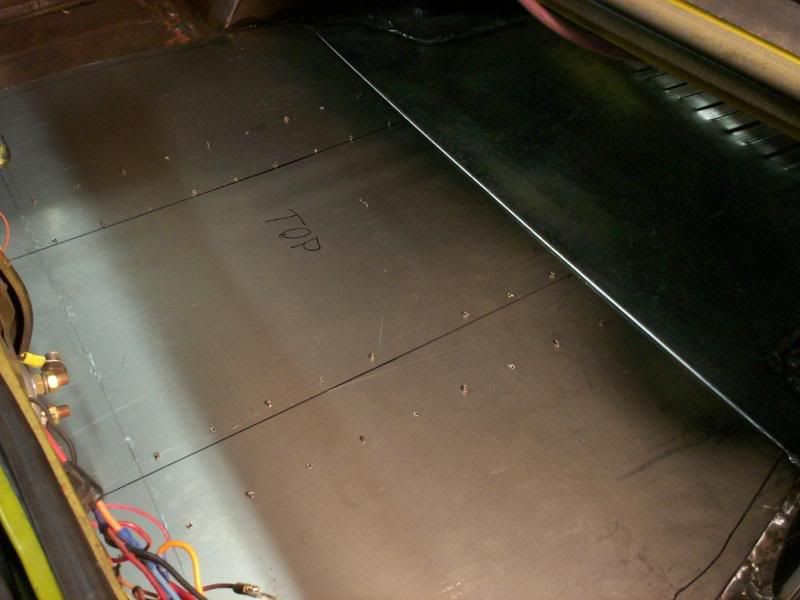
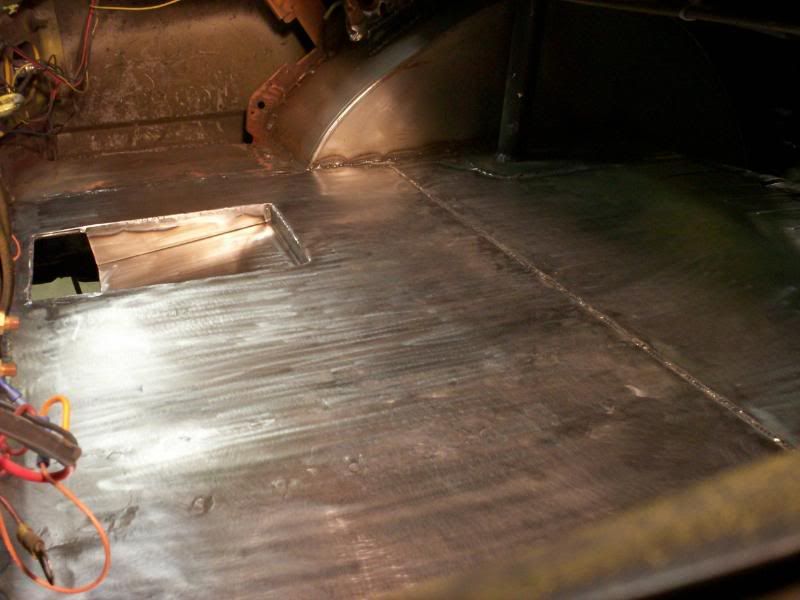
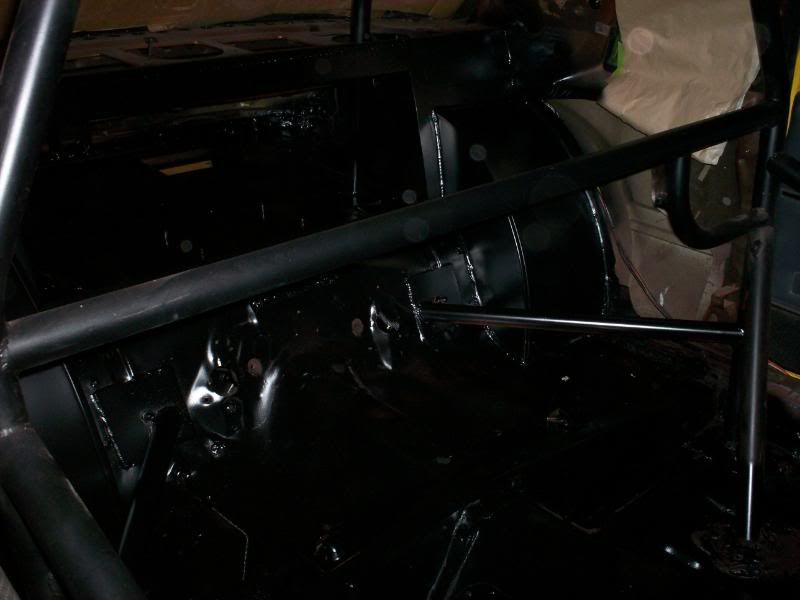
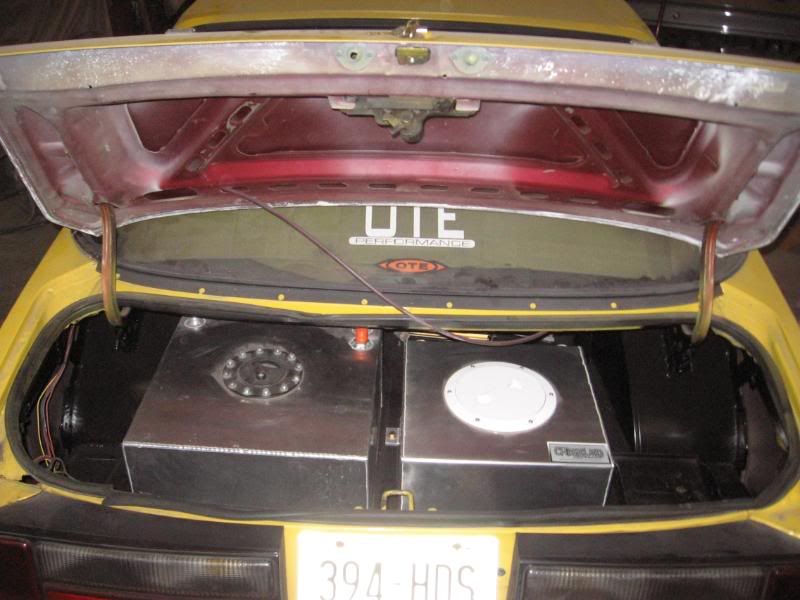
After the rear suspension was done we moved onto finishing up the trunk area and rear bulkhead.
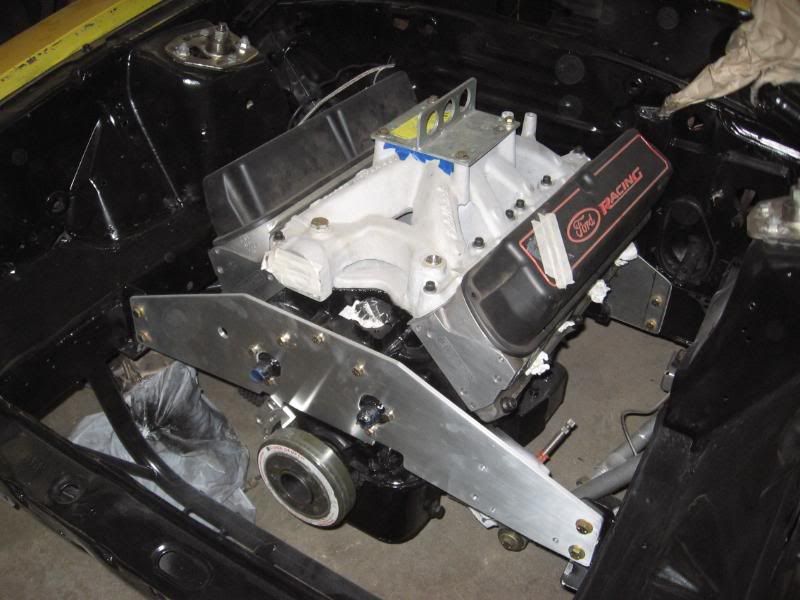
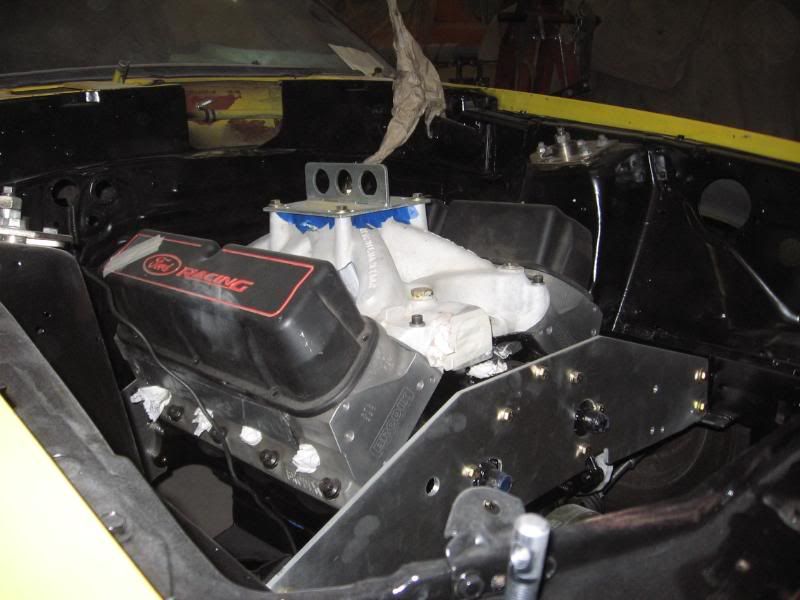
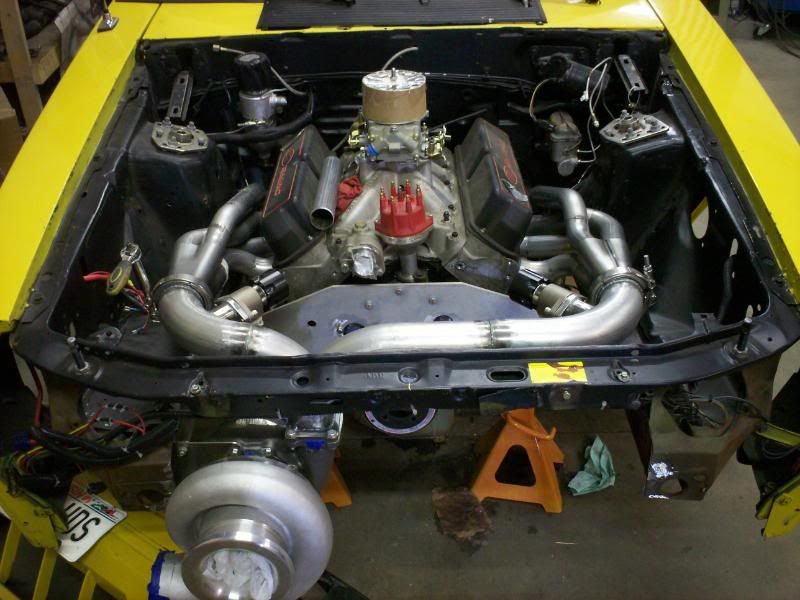
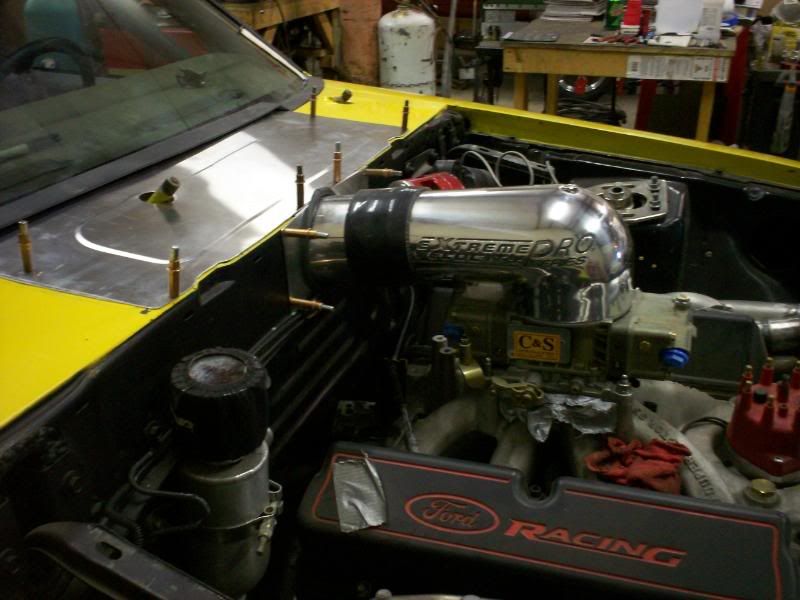
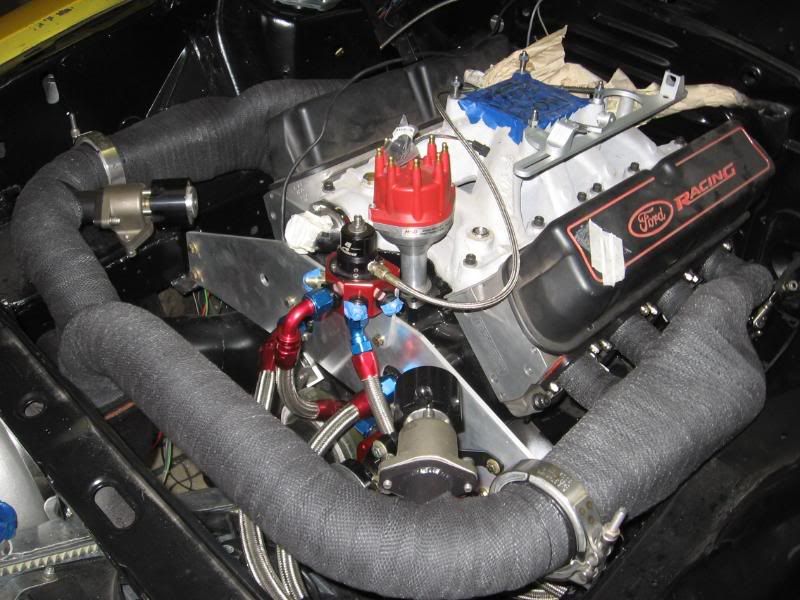
Next we started to work on mounting the motor and trans. I don’t have any good shots of the mounts before the engine bay was painted, but I have some from after.
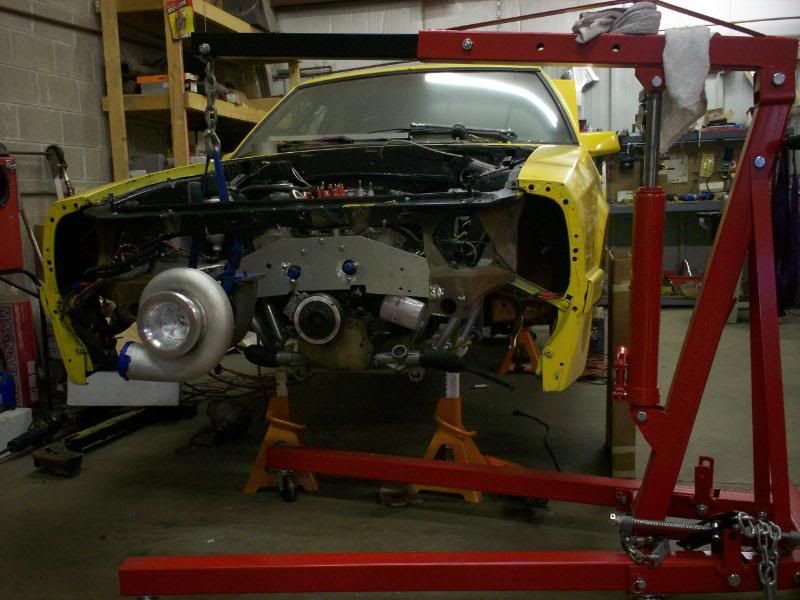
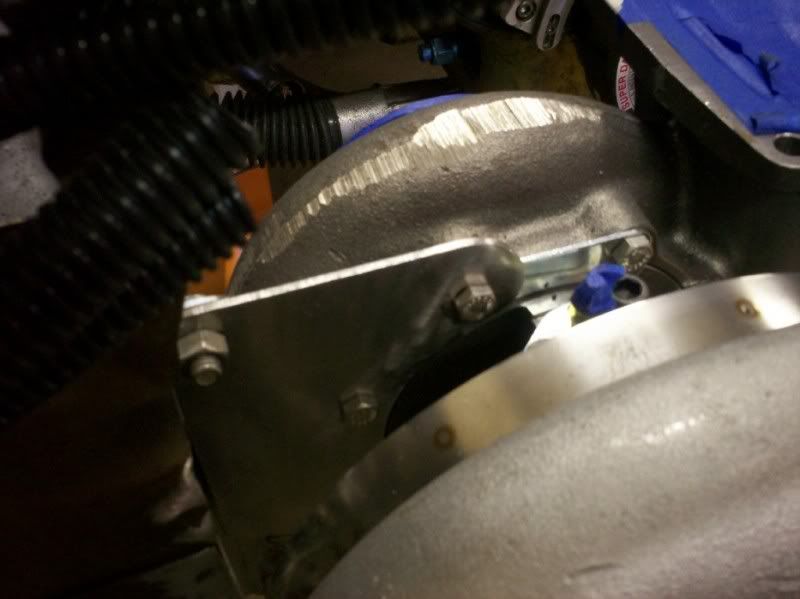
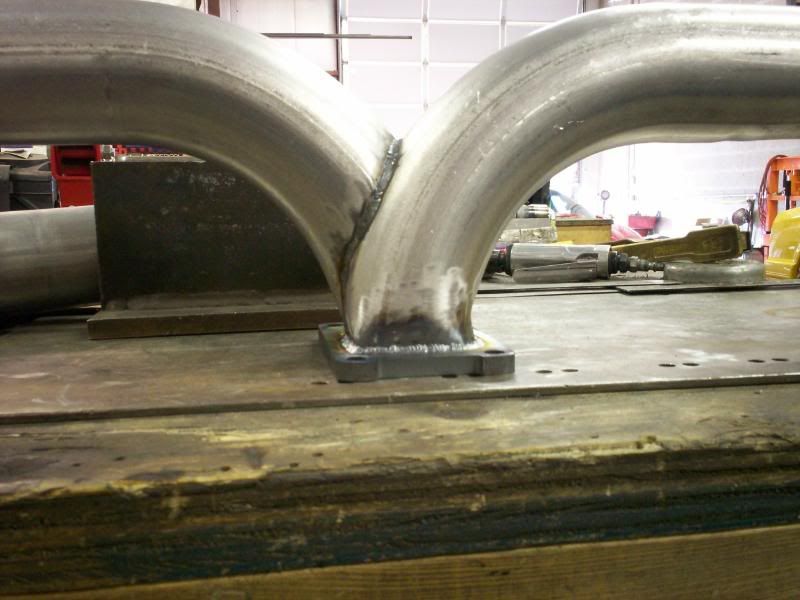
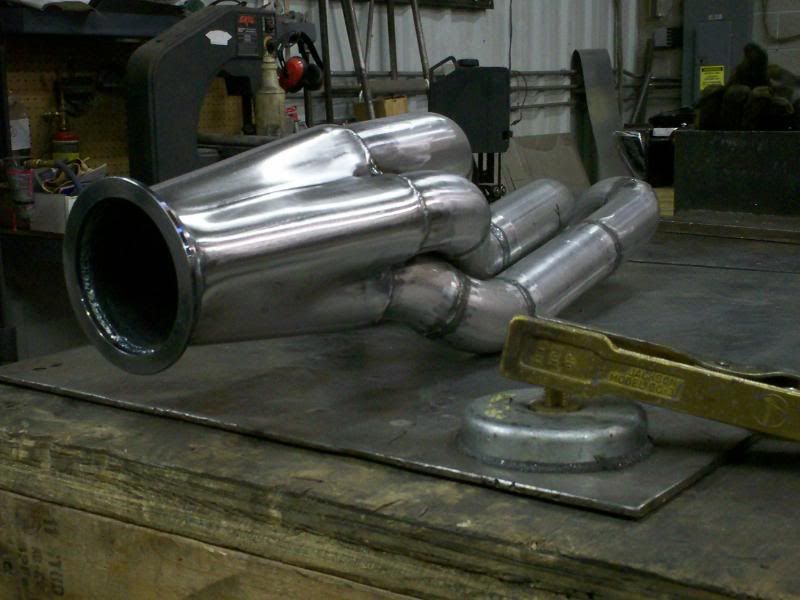
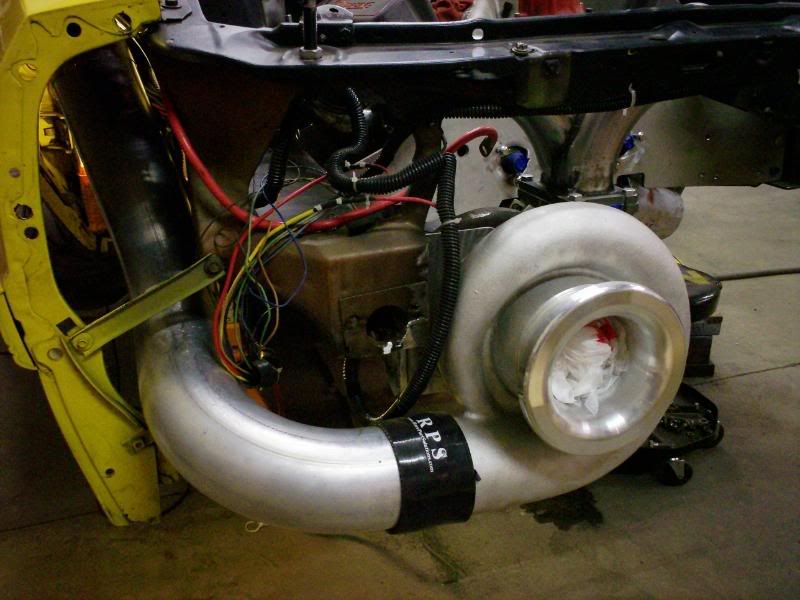
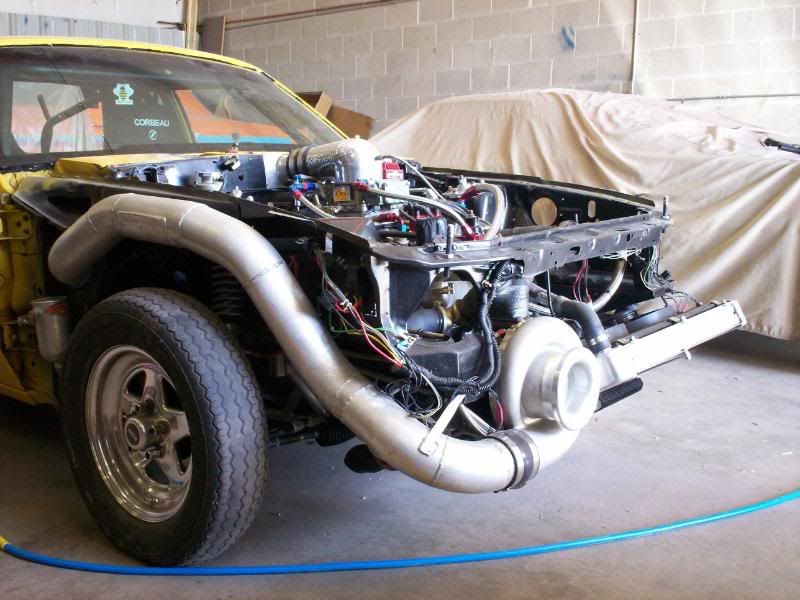
Here are all the pics of the hotside including the turbo mount.
Crossover and turbo mount:
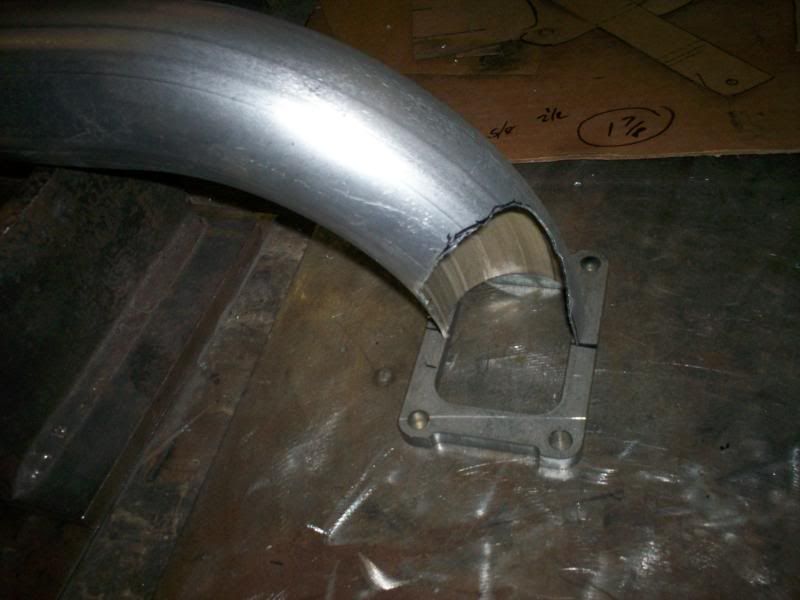
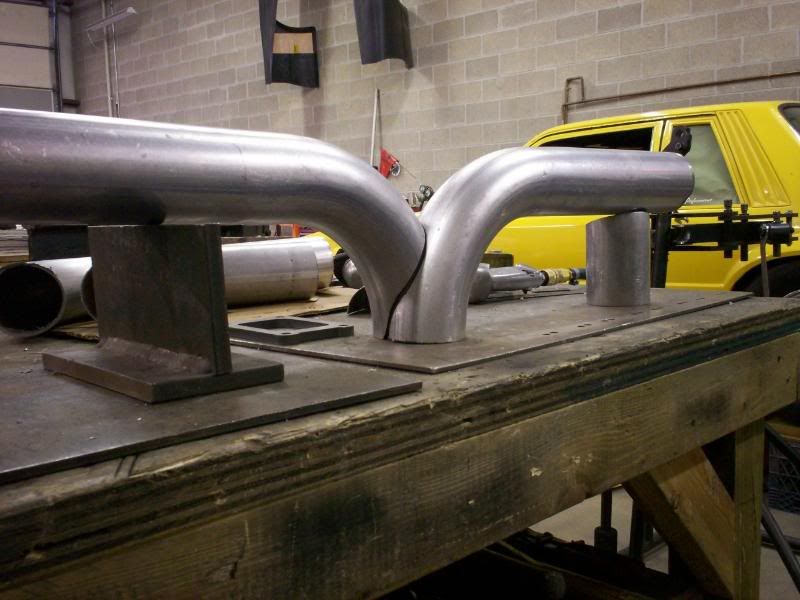
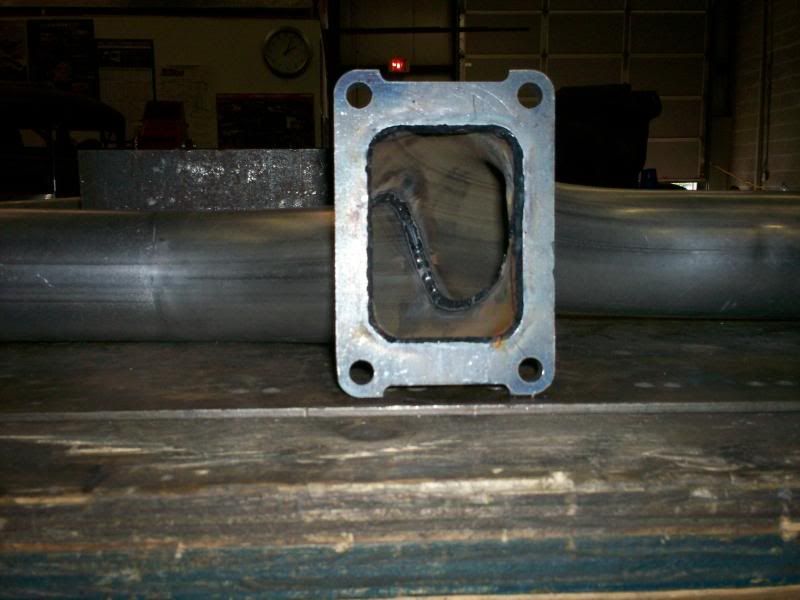
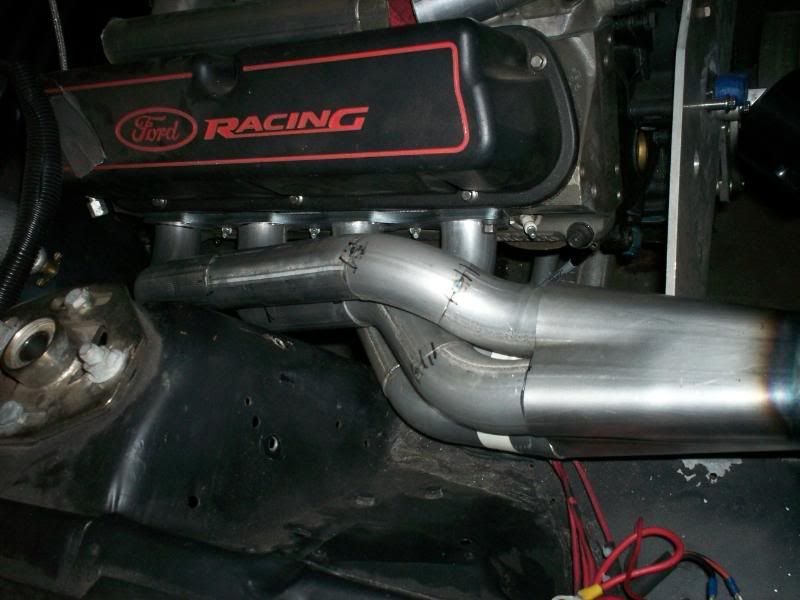
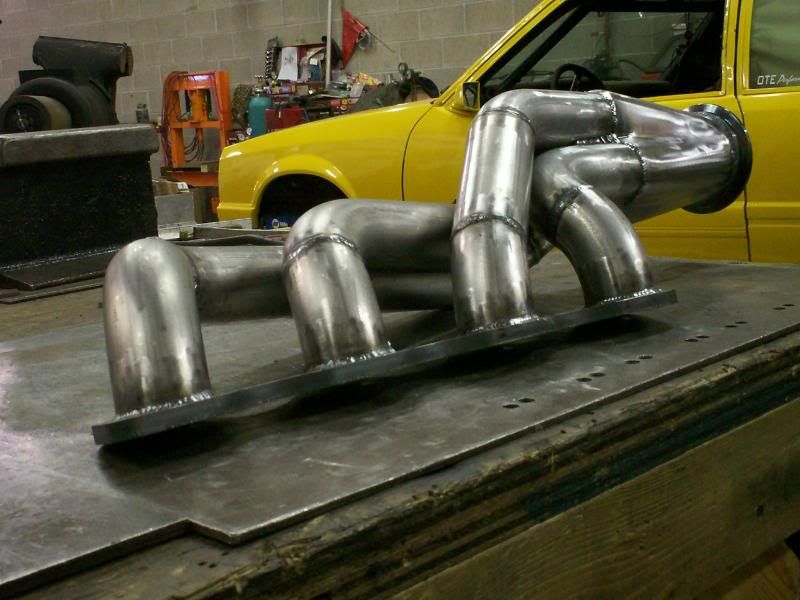
Headers:
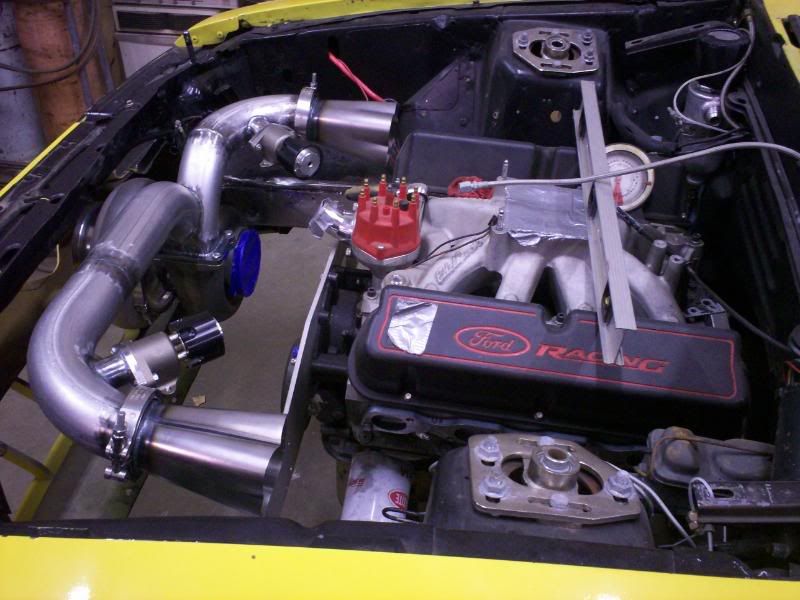
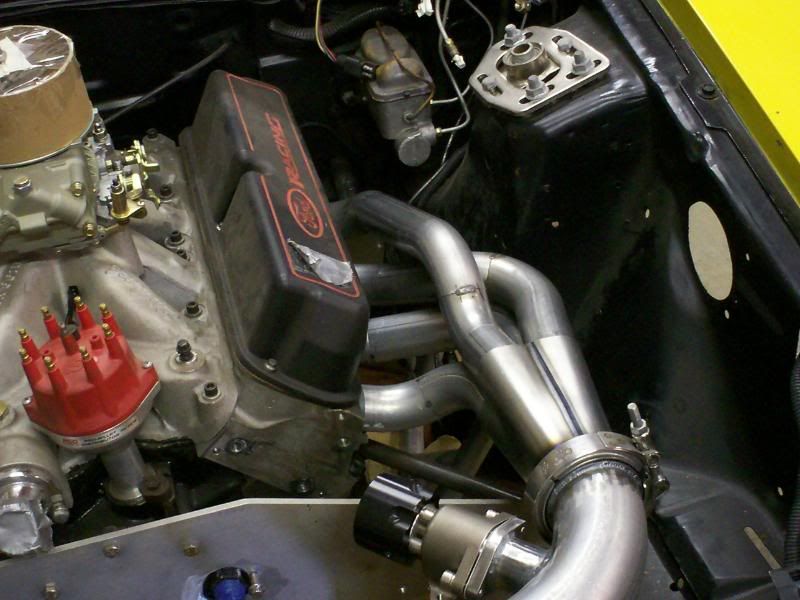
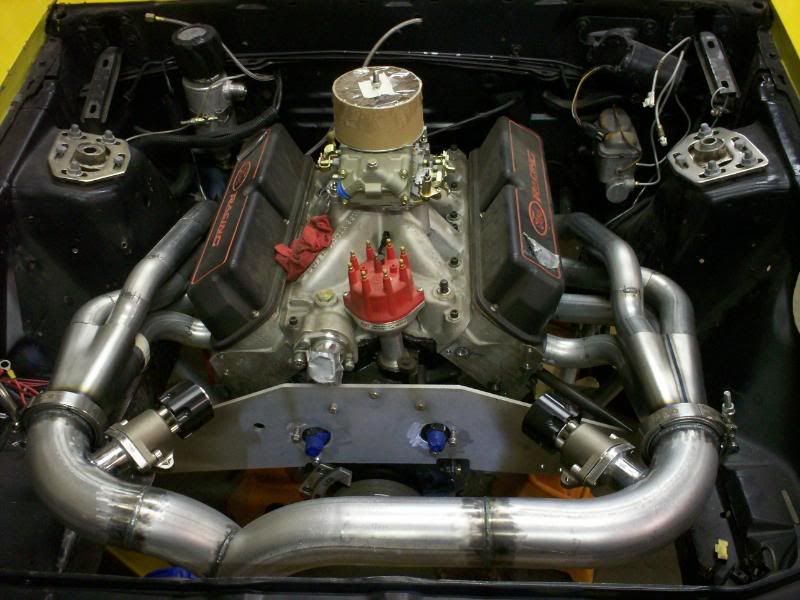
Complete hot side:
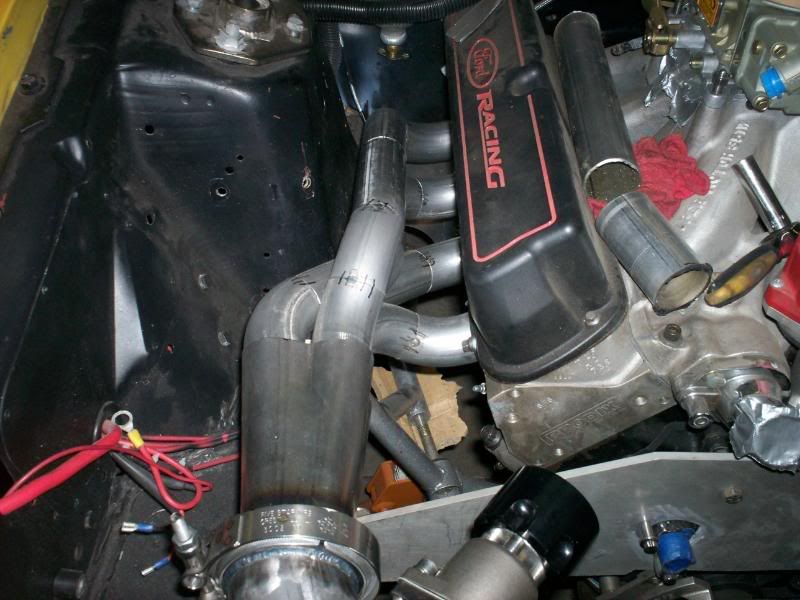
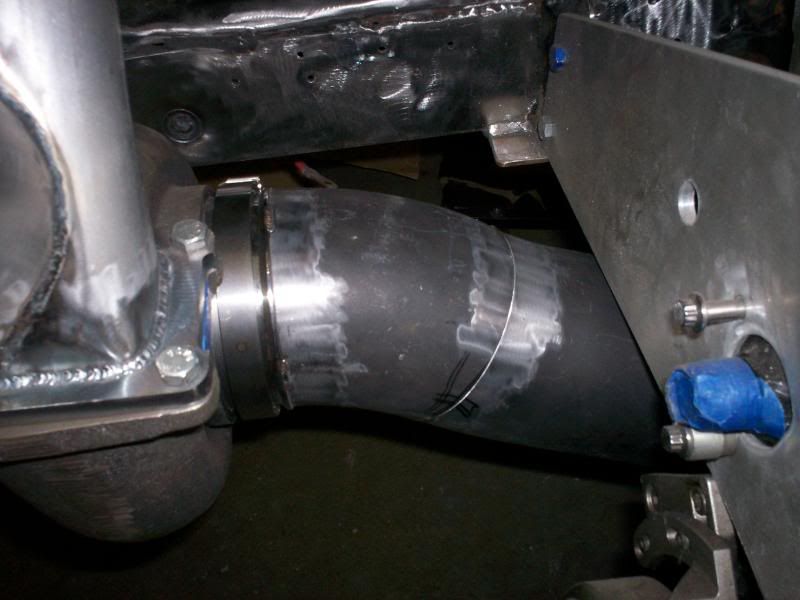
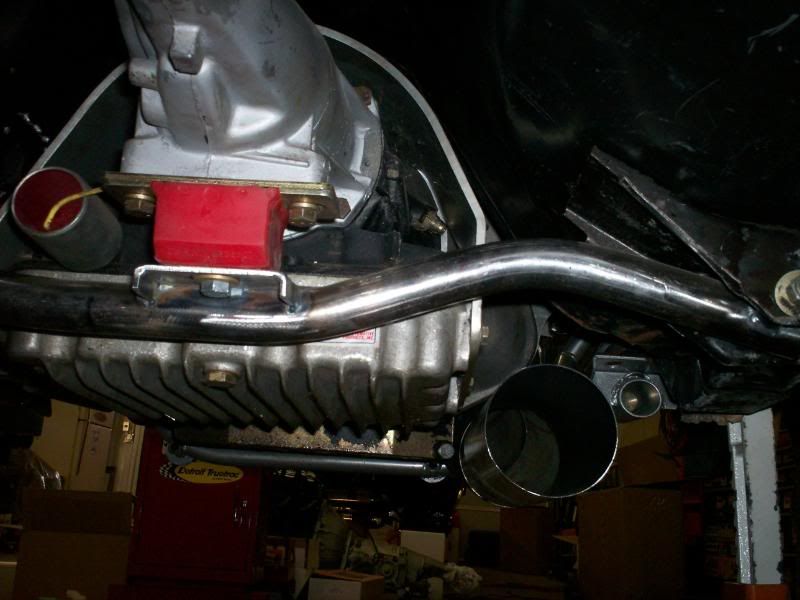
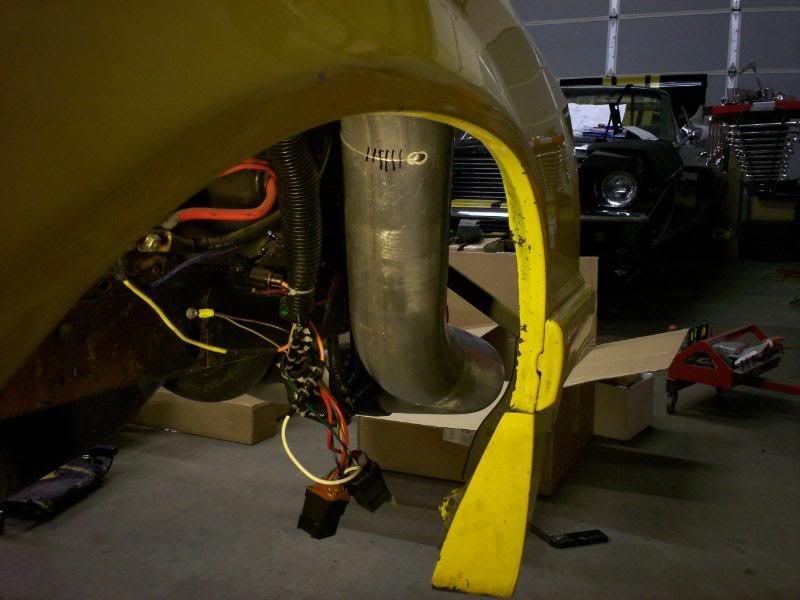
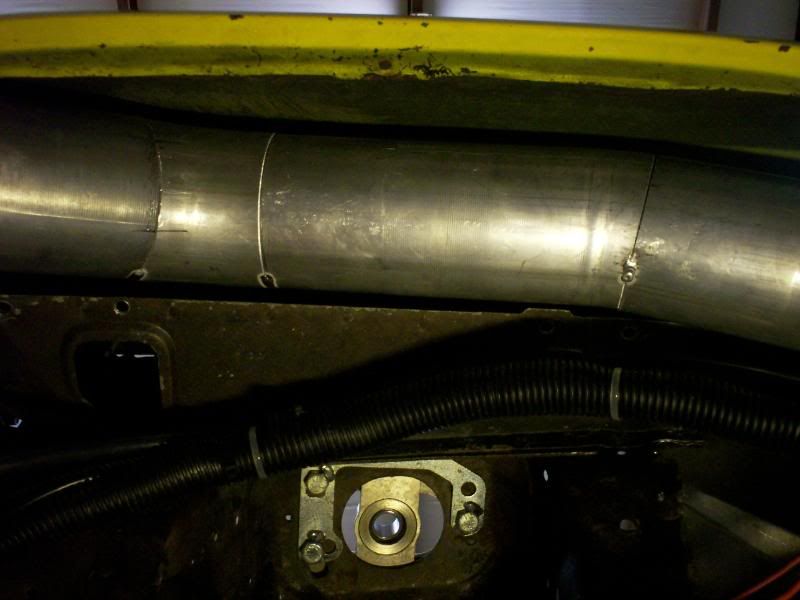
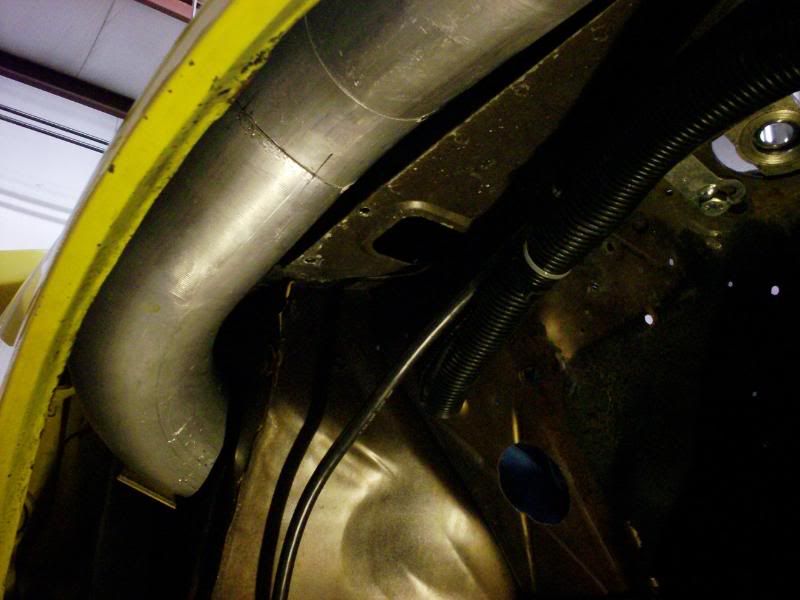
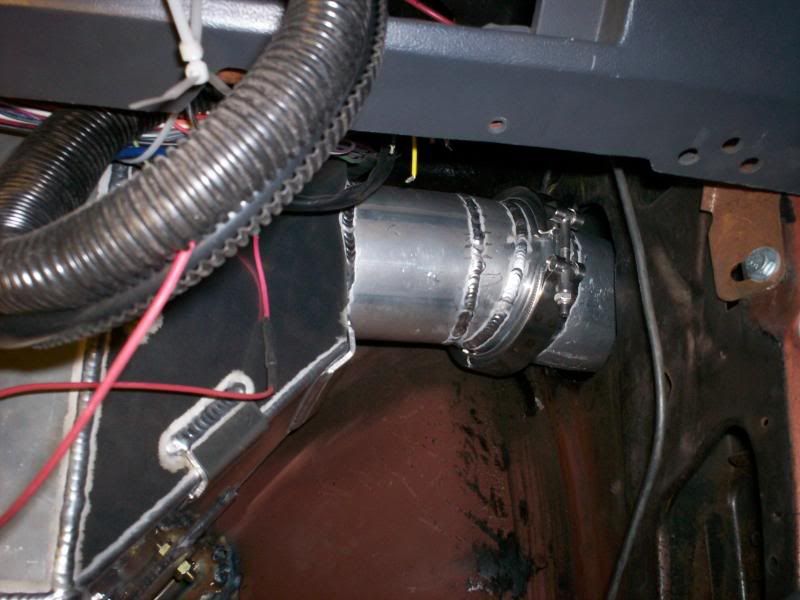
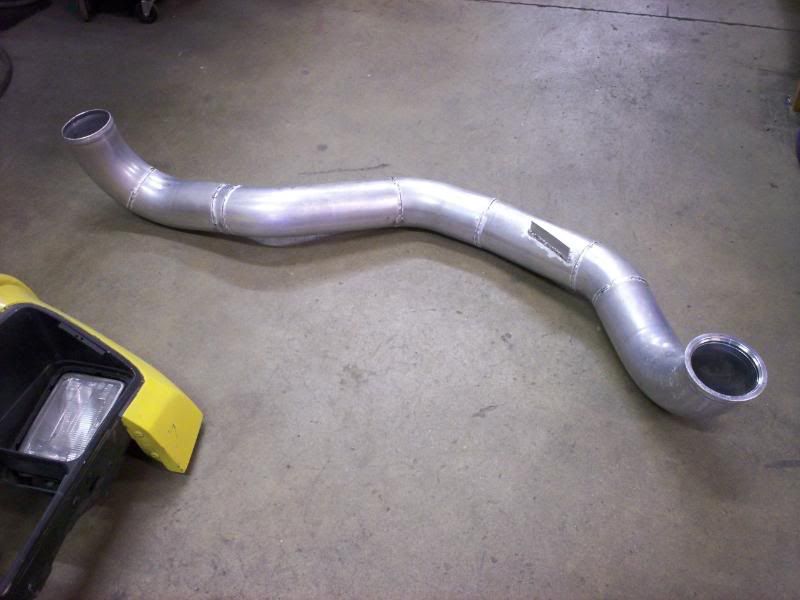
Downpipe:
Downpipe 2nd section—5” to the axle:
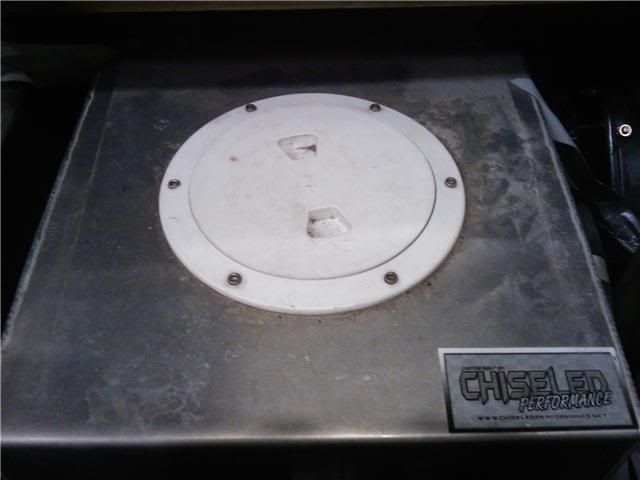
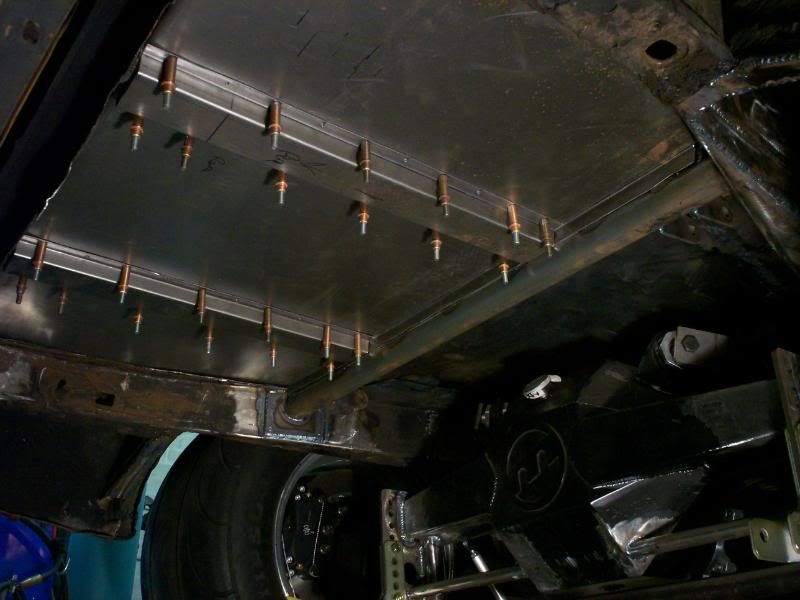
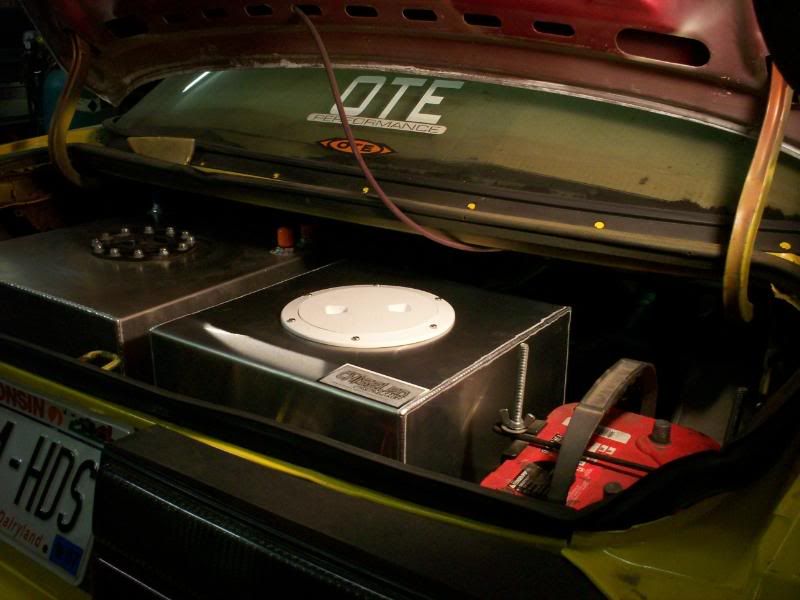
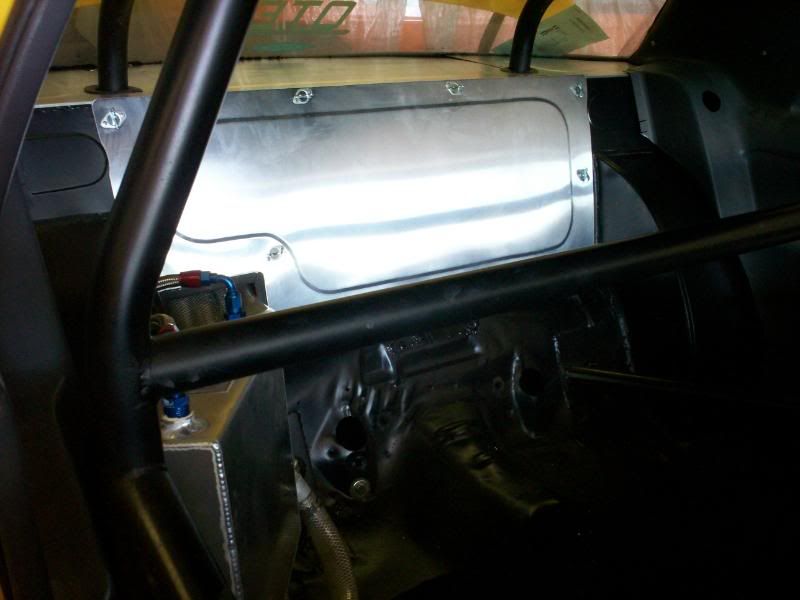
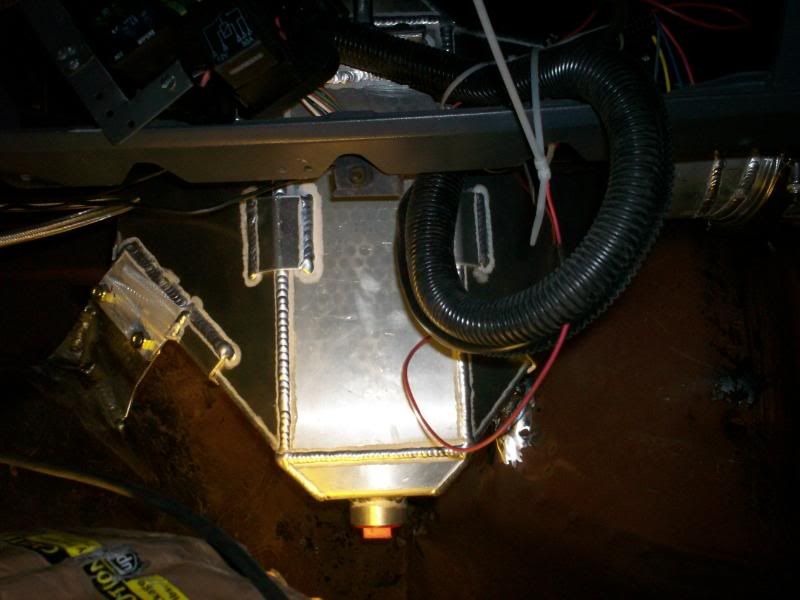
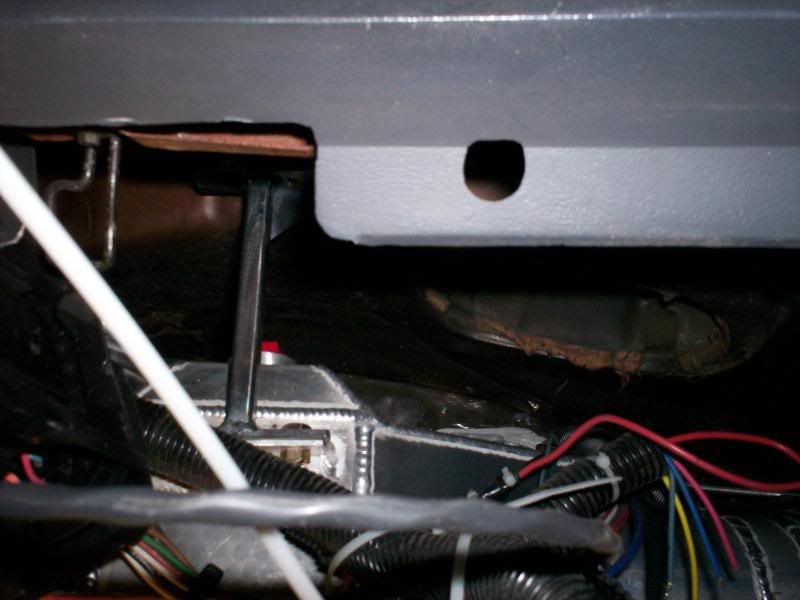
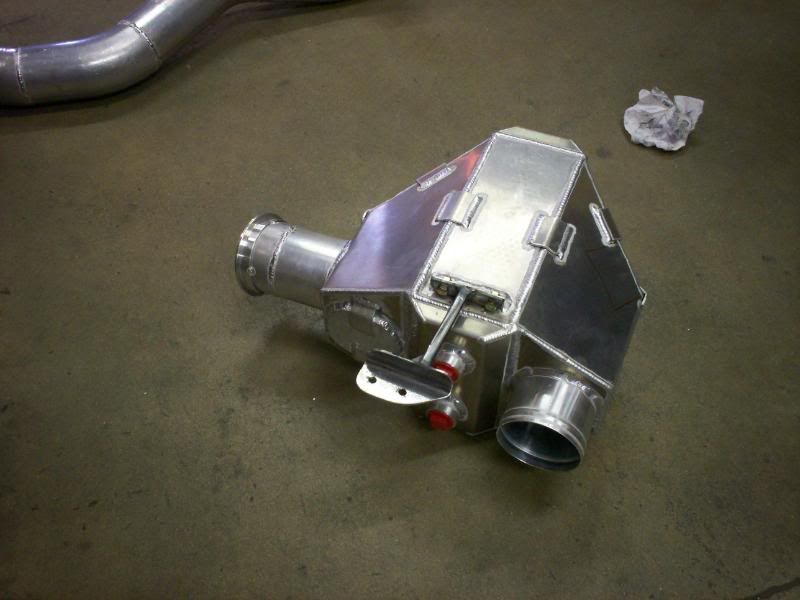
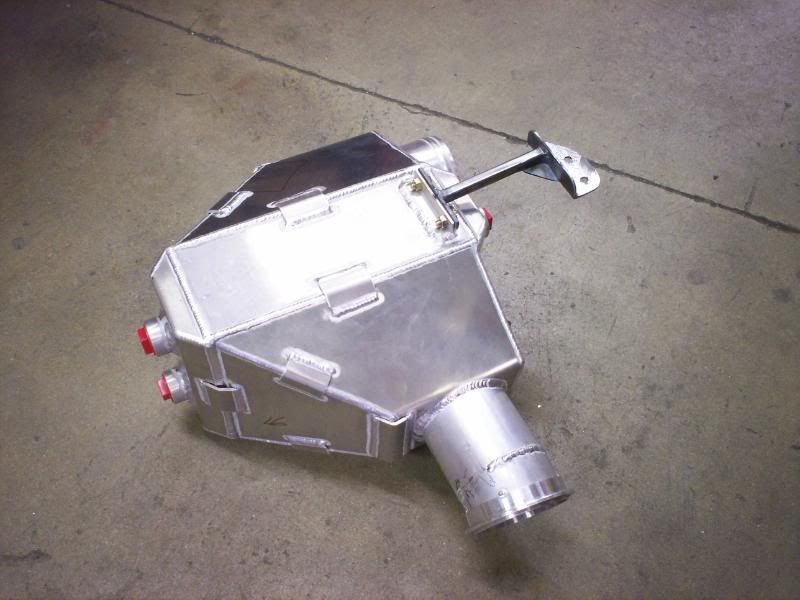
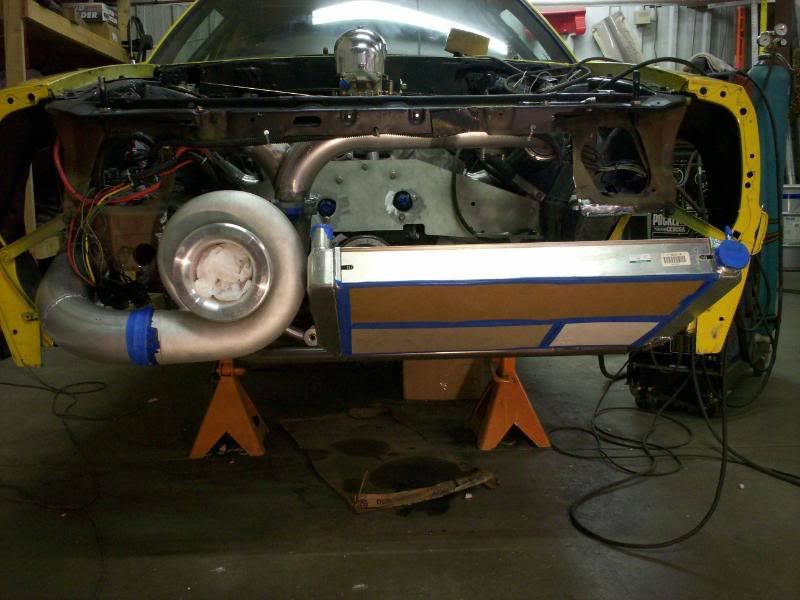
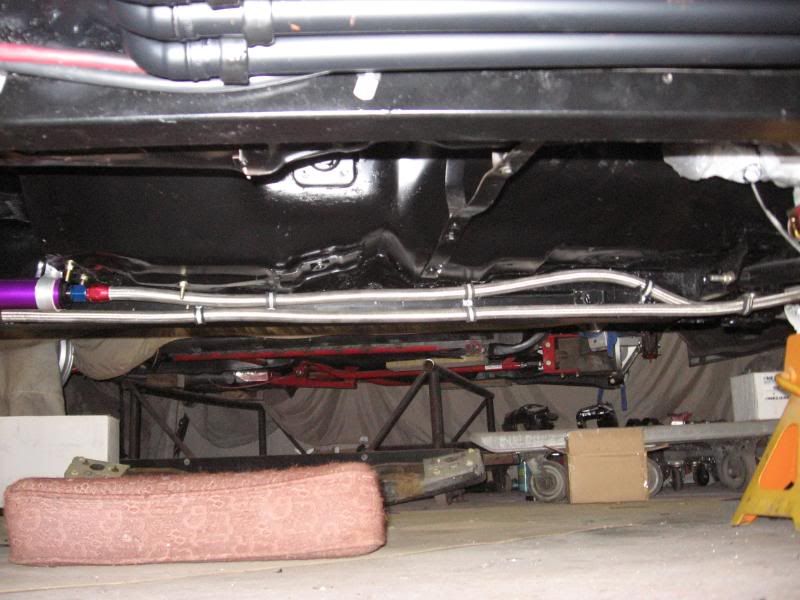
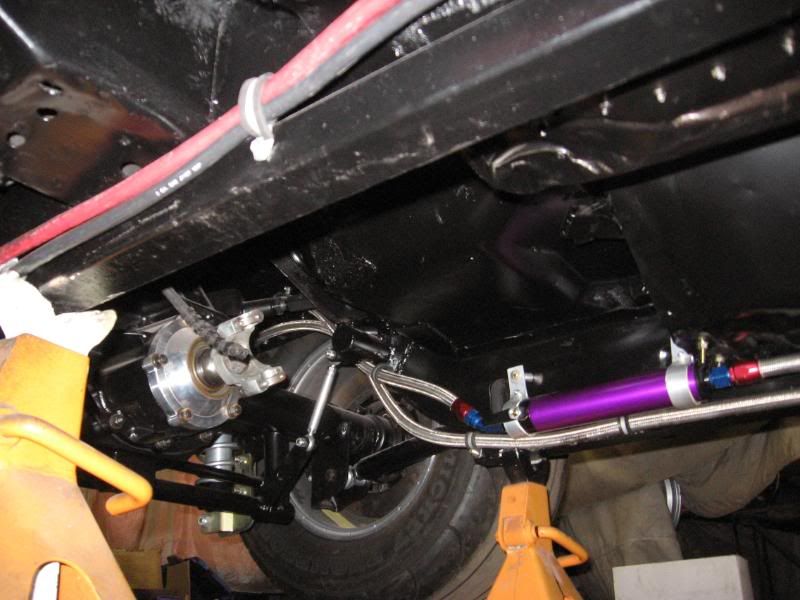
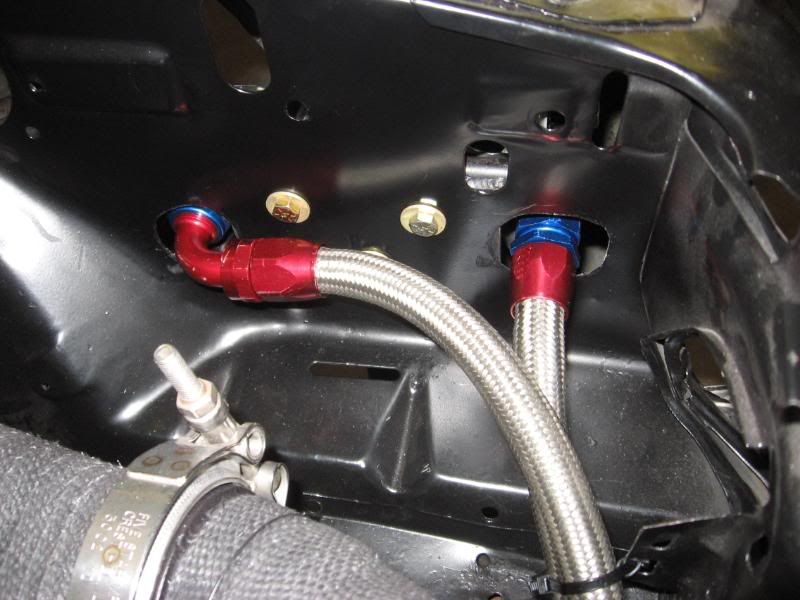
The intercooler system and cold side was next on the list to finish. It consisted of a Chiseled Performance 2000HP under dash model cooler and also included an ice water trans cooler, which is pictured above in the trunk/bulkhead pics. I wish I had better shots of how we routed 4-1” feed and return lines under the car, but those pics were lost. We used 1” copper tubing under the passenger side and connected the points with thatched 1” hose. I wanted it like this to keep it out of the way and neatly organized.
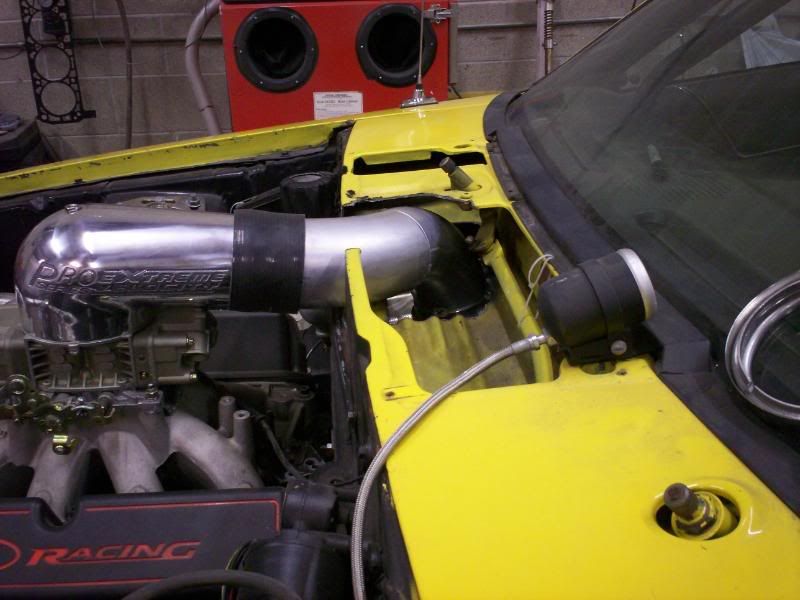
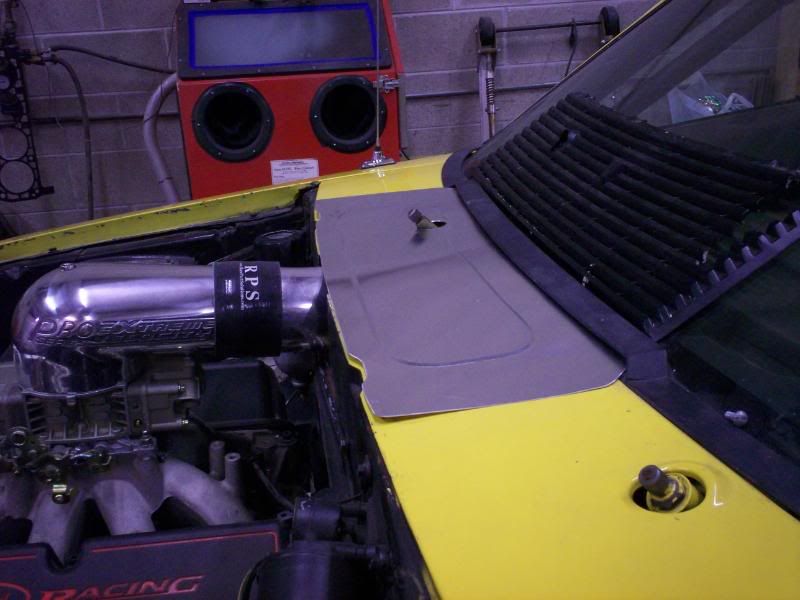
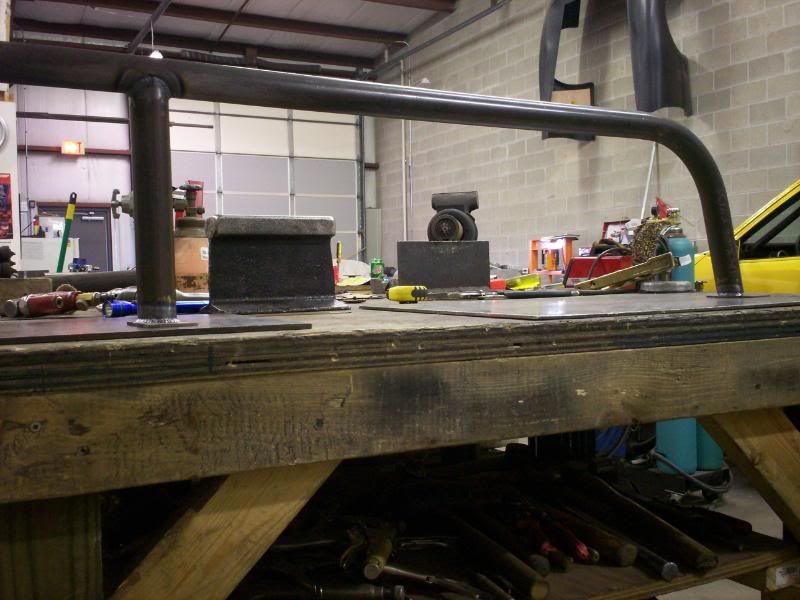
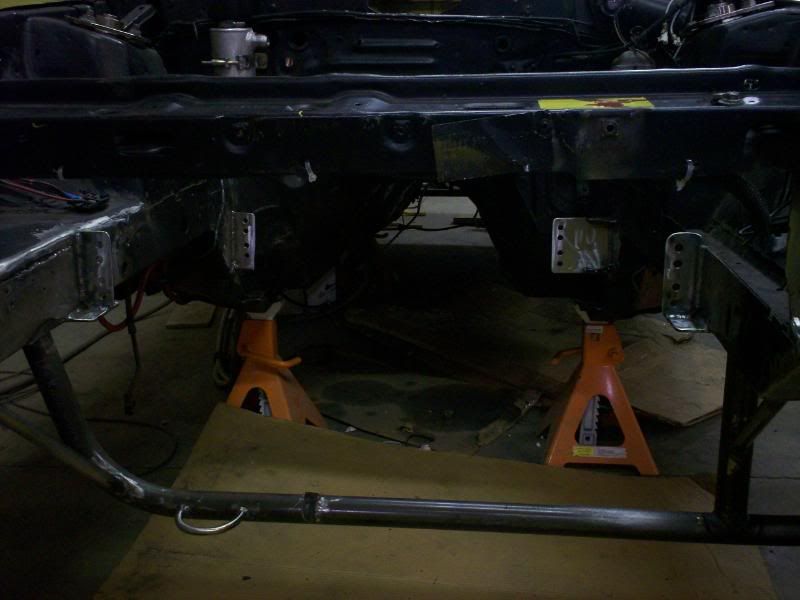
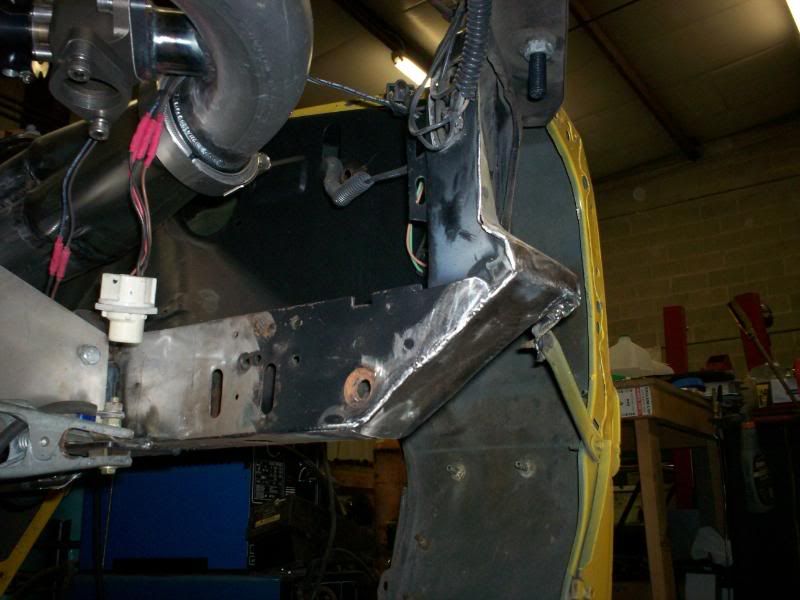
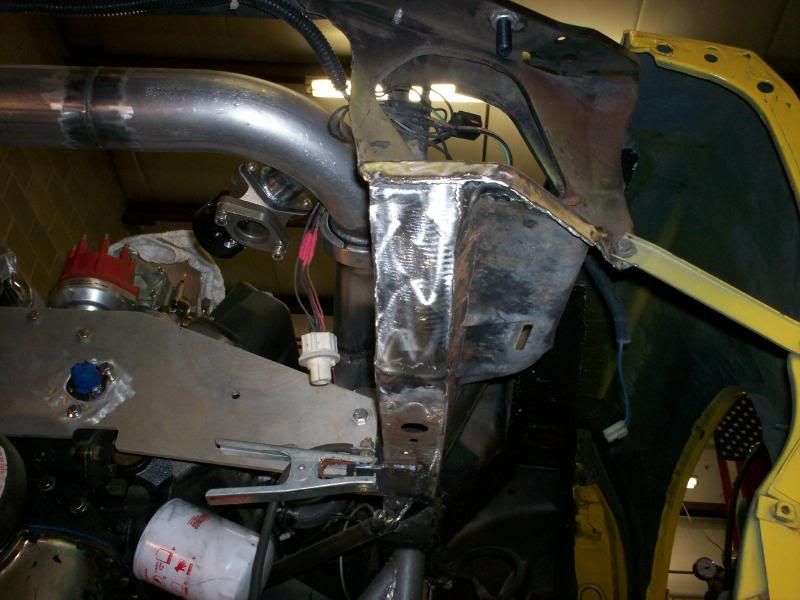
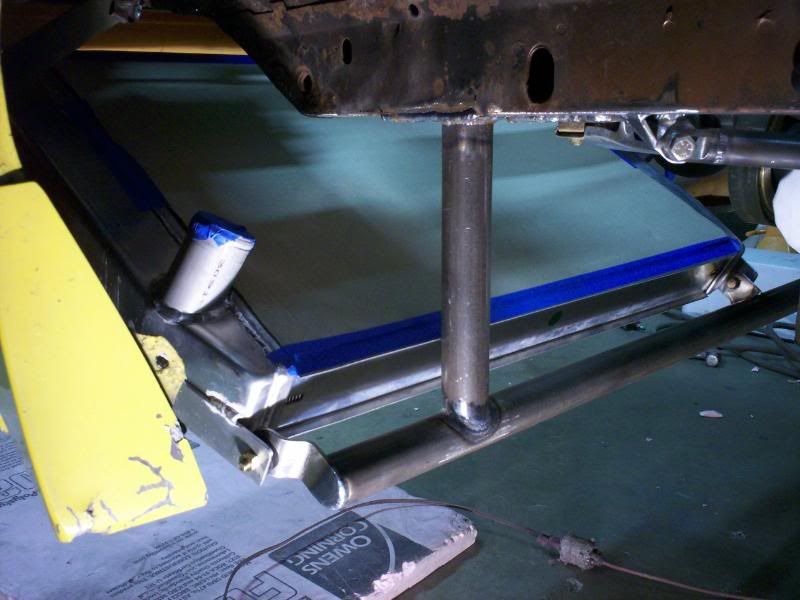
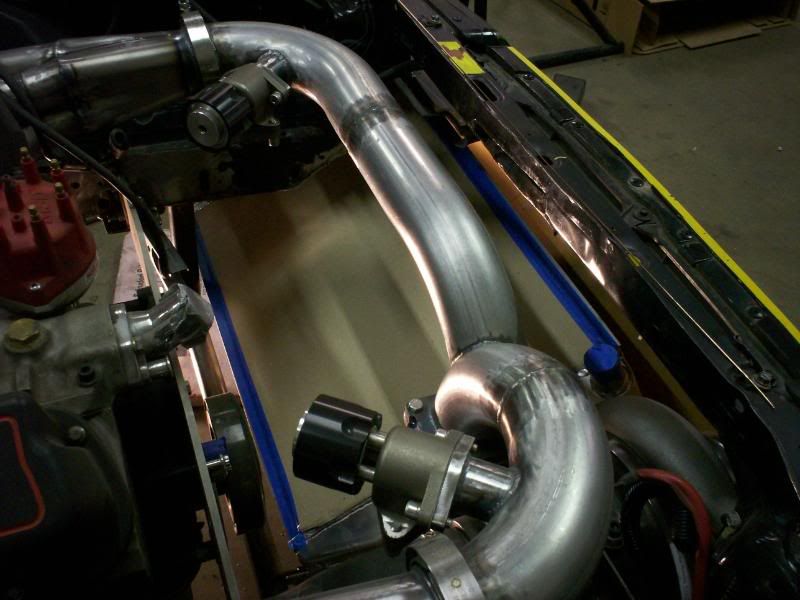
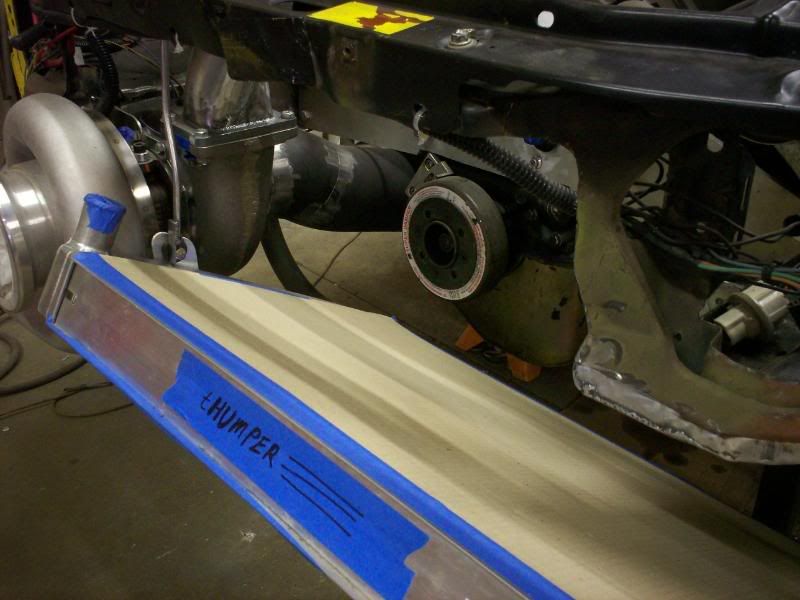
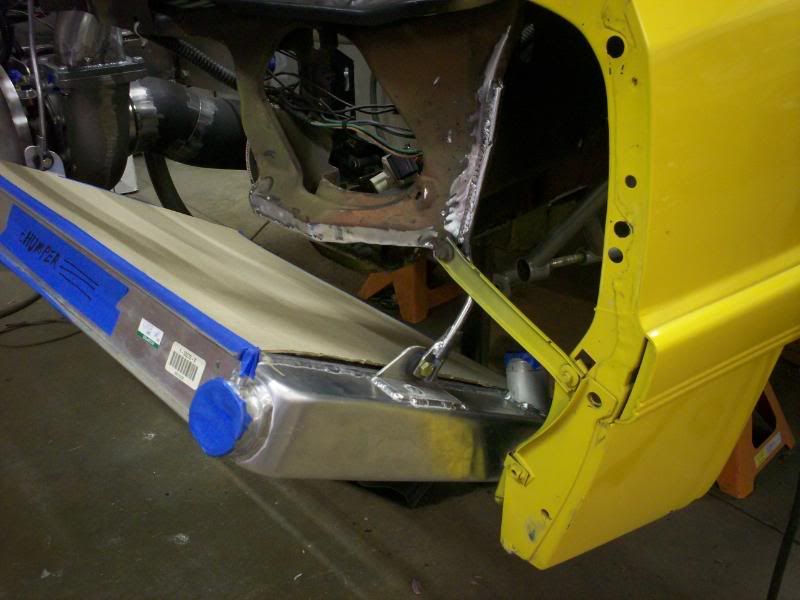
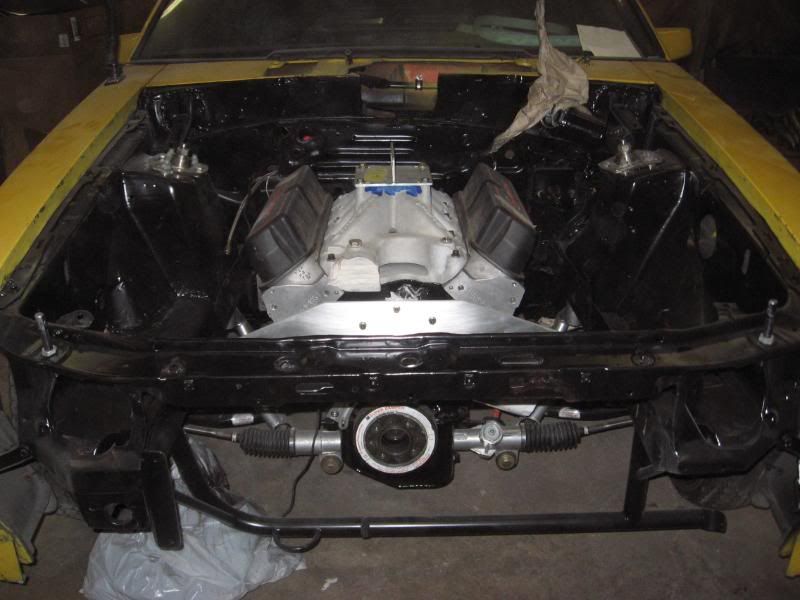
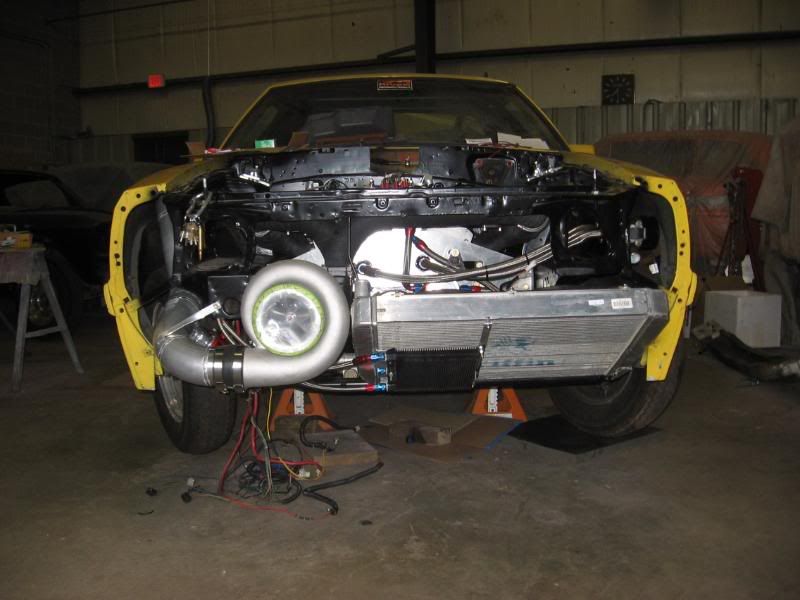
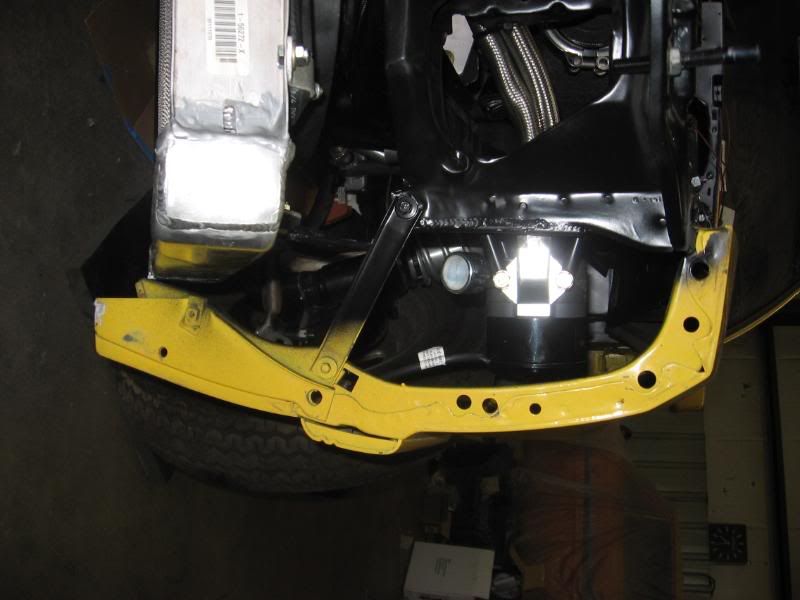
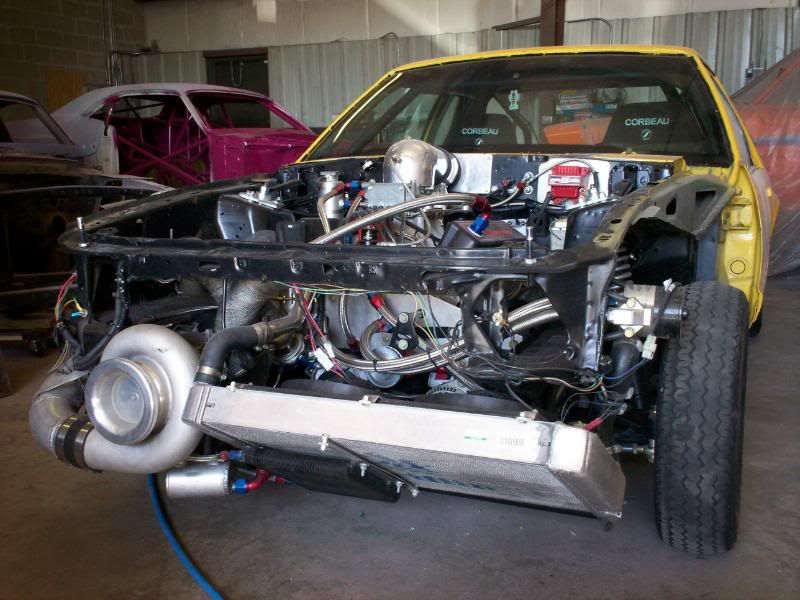
After all the hot and cold sides was done it was time to figure out the radiator mounting situation. We decided to lose the factory radiator support and create our own further back so we could get the 31”X19”X3” radiator in the front of the car. We also had to “clearance” the frame in the front to get the radiator positioned. An air bleeder tank had to be added in line because the radiator was mounted so low.
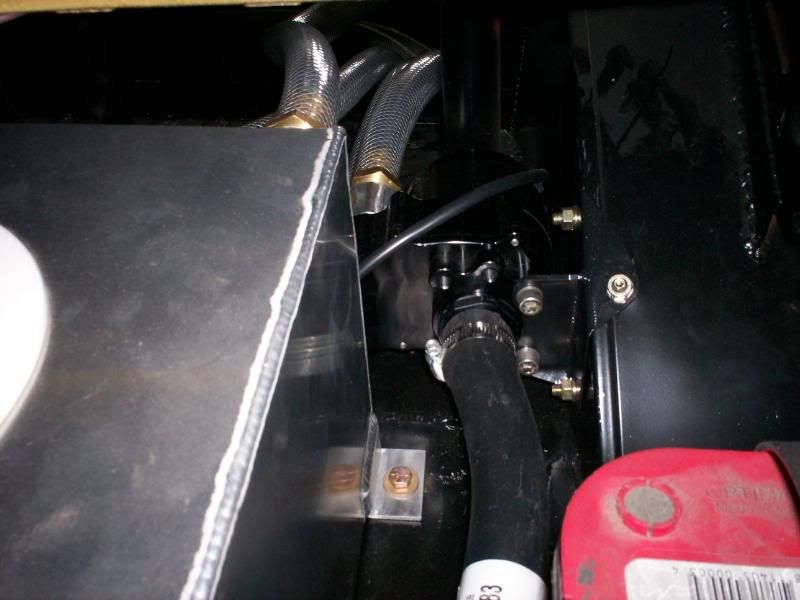
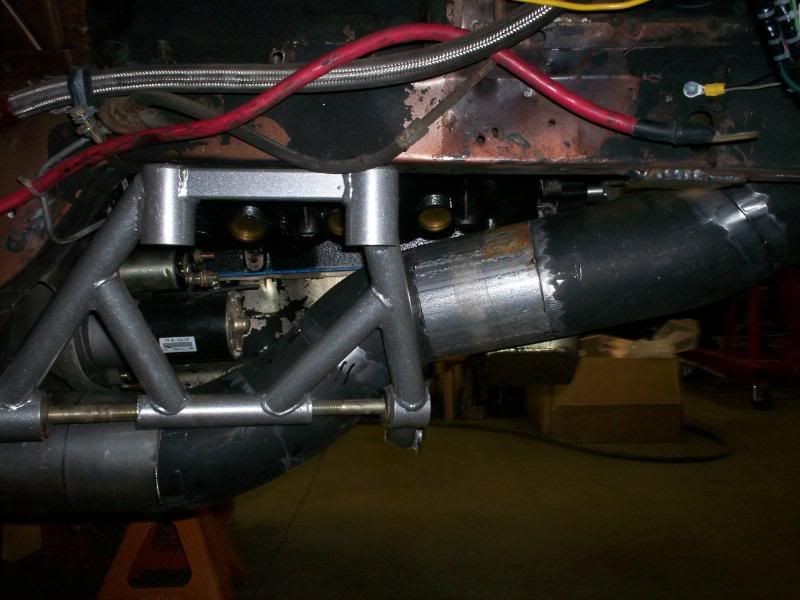
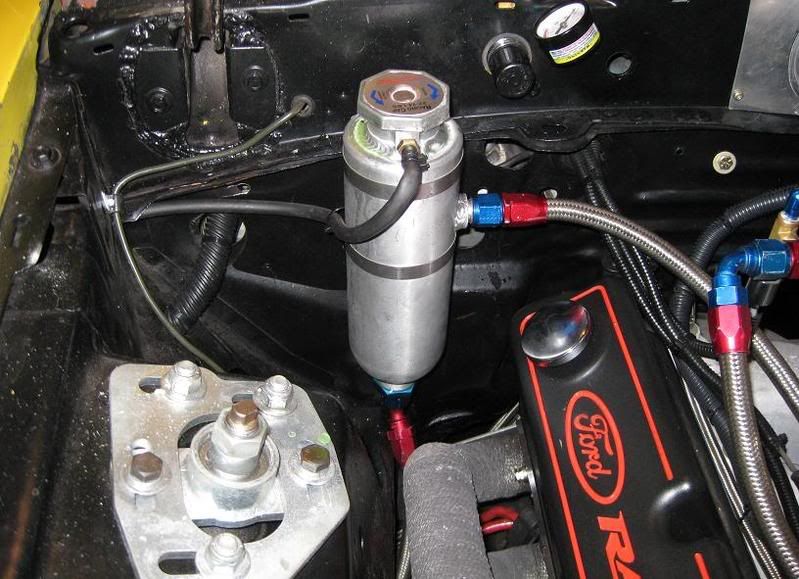
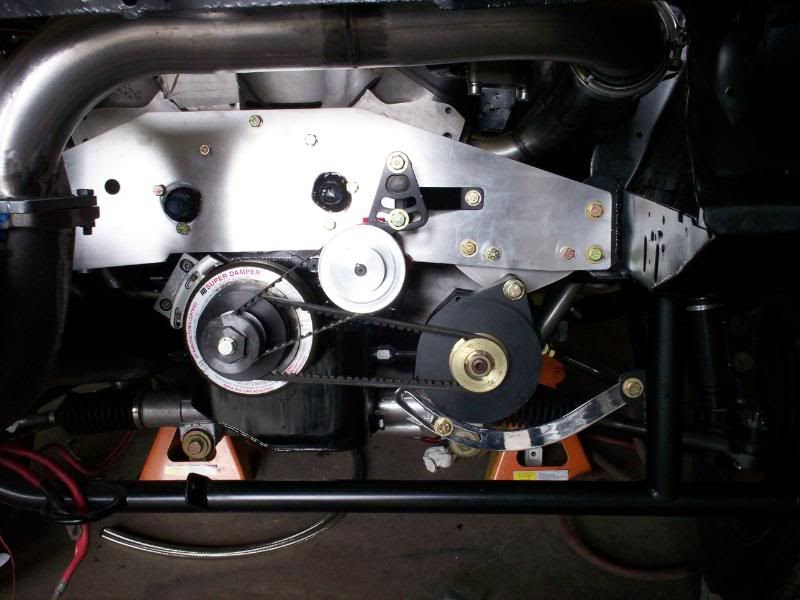
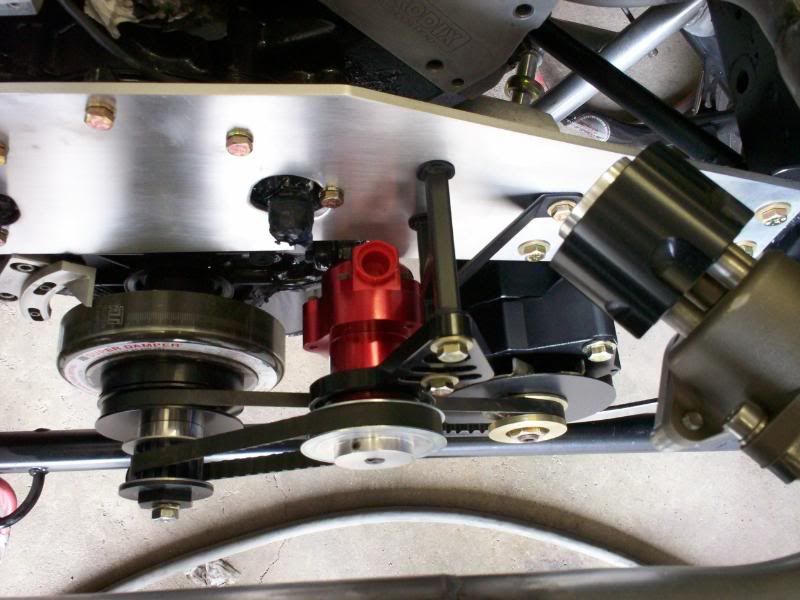
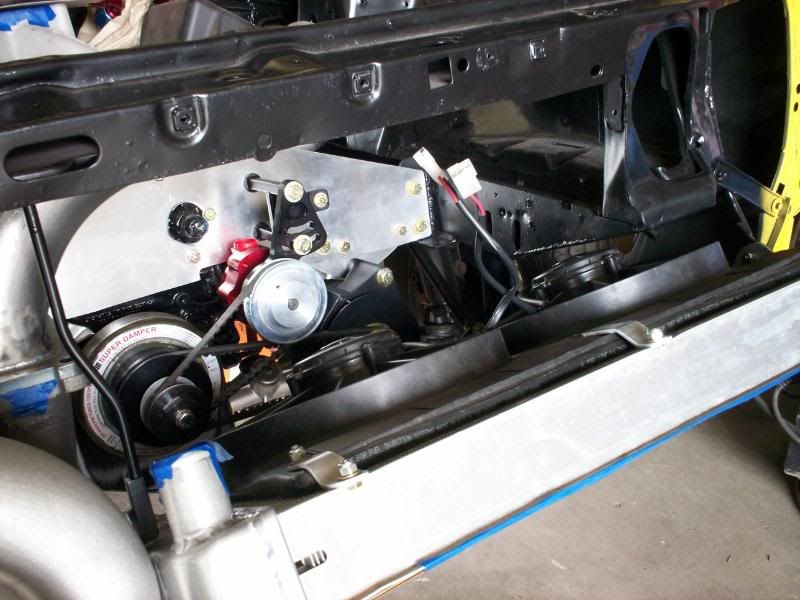
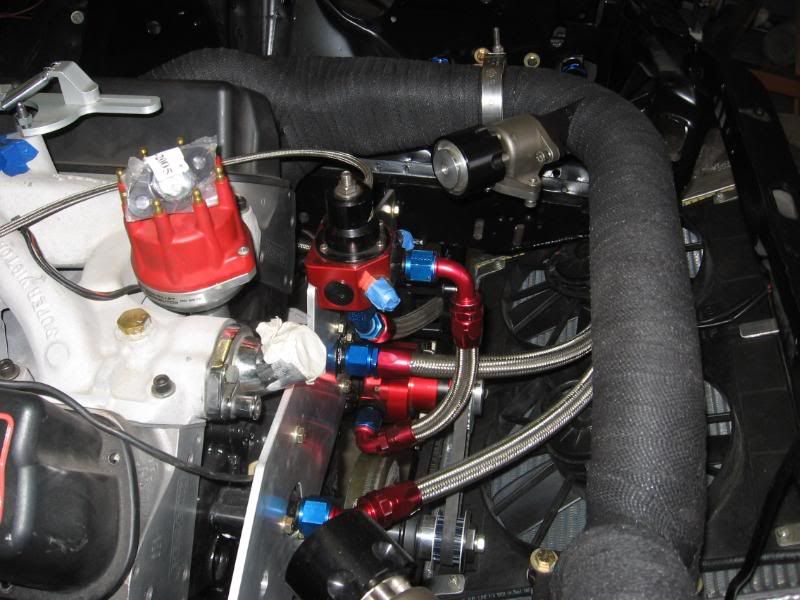
Lastly, here are some pics of the fuel pump mounted and the alternator.
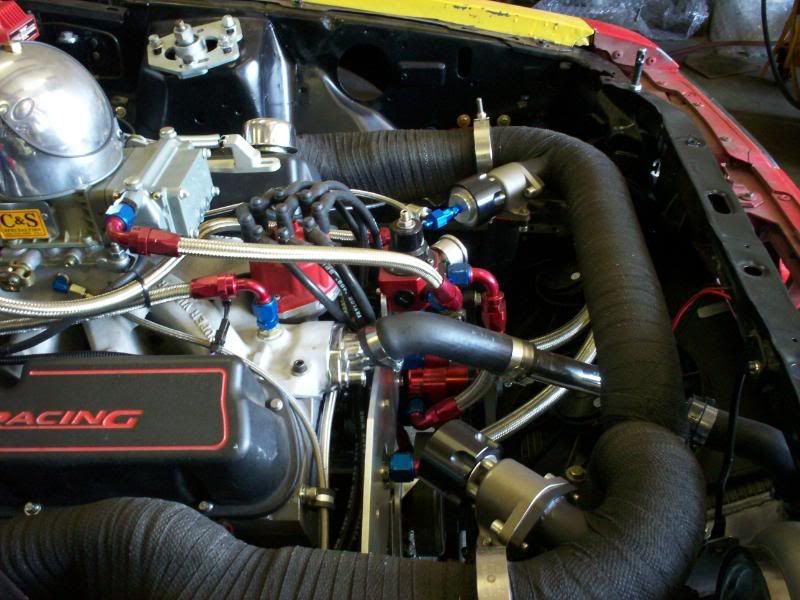
At this point we were ready to pull everything back apart, paint everything, and put it back together. Here are some shots of how everything came together.
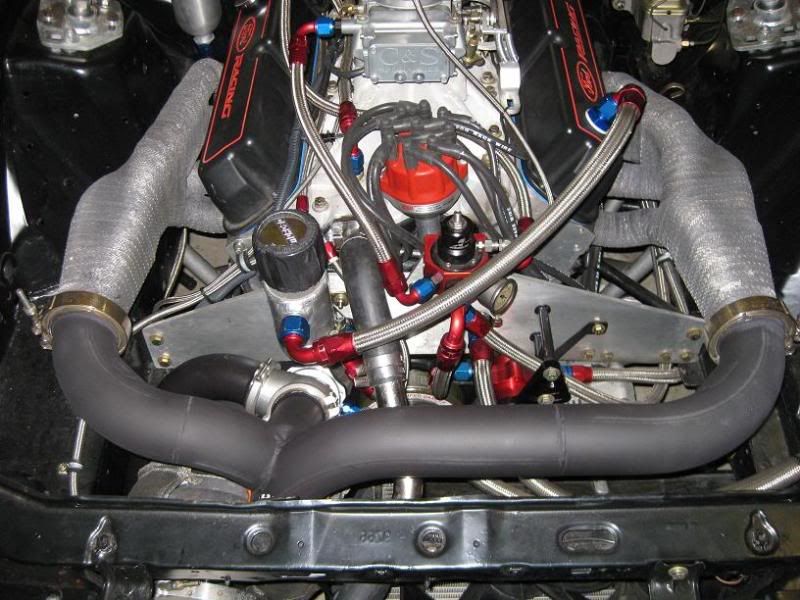
(I changed wastegate setups last year and this is how the engine bay looks now-this was before I rewrapped the crossover)
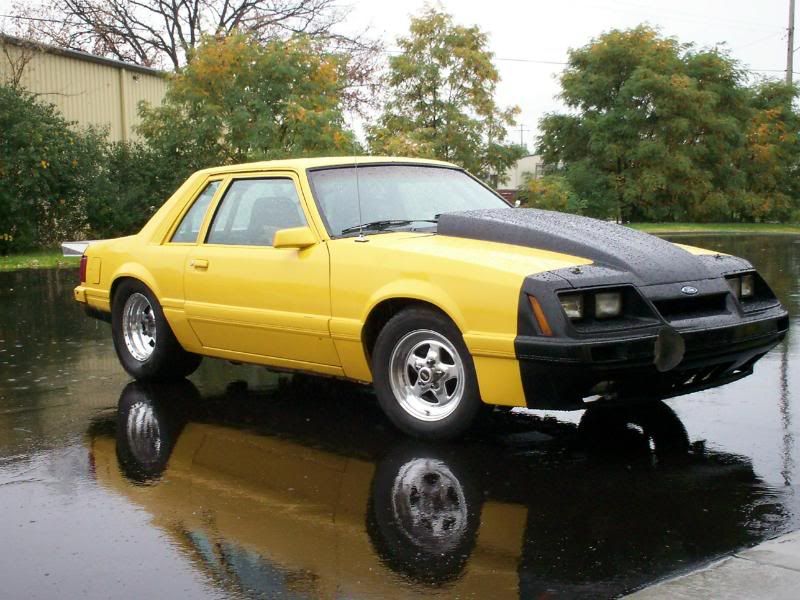
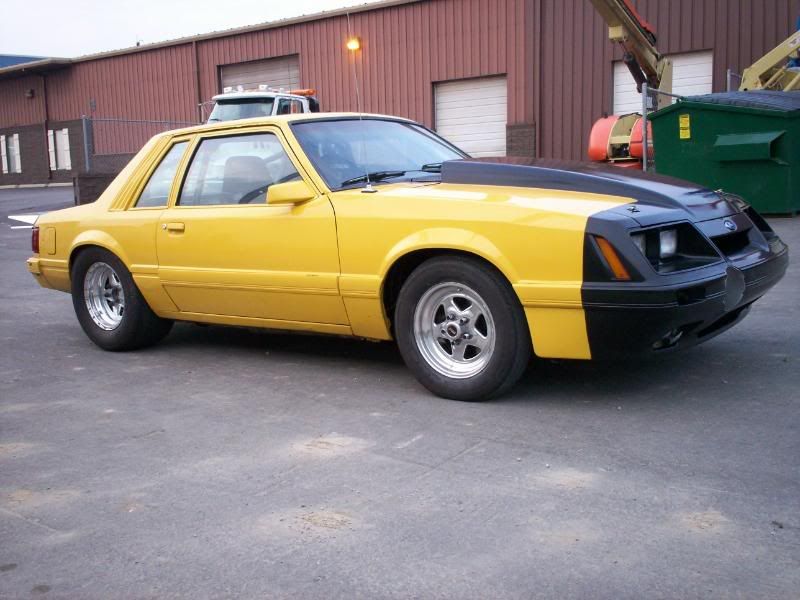
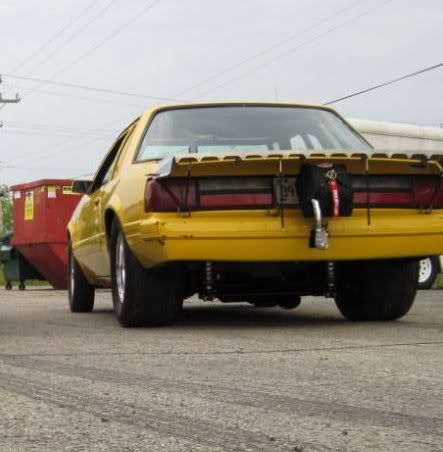
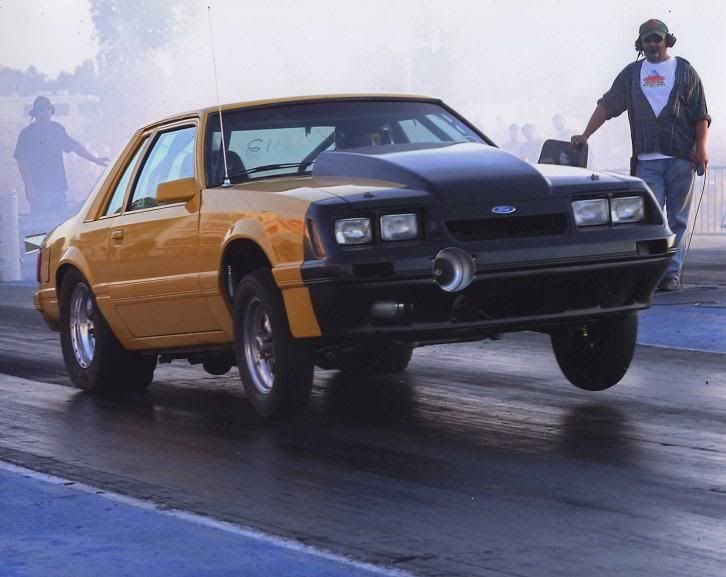
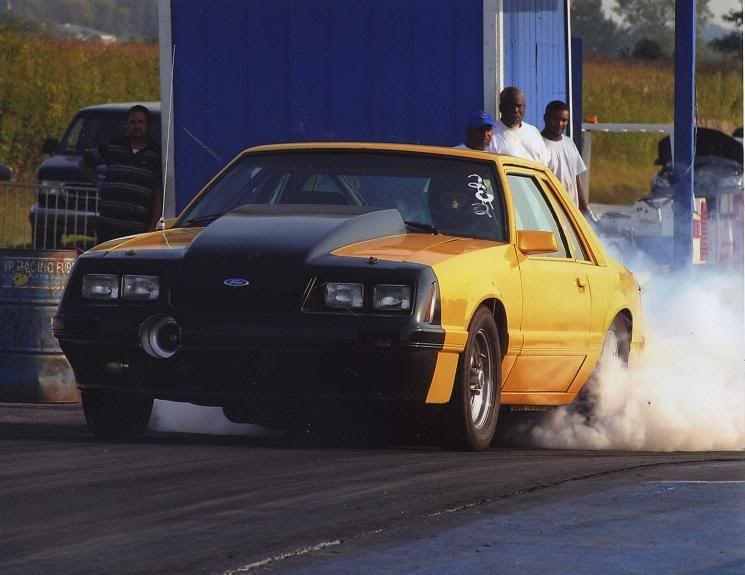
And here are some final pics of what it looked like finished on the outside with some track pics included.
Here are some track and dyno vids of the car in action:
http://s20.photobucket.com/albums/b2...=dynovid12.flv
http://s20.photobucket.com/albums/b2...=dynovid11.flv
http://s20.photobucket.com/albums/b2...obby841two.flv
Thanks a lot to Tom for all the hard work on this project!! Everything turned out better than I could have imagined!!
Results 1 to 20 of 171
-
05-19-2009, 05:58 PM #1Pumpgas Streetcar


- Join Date
- Feb 2005
- Posts
- 2,033
PROJECT: '86 Turbo Mustang--Thanks to OTE!
Last edited by FourEyedFord; 05-31-2009 at 03:32 AM.
-
05-19-2009, 06:09 PM #2SBF>LSX

- Join Date
- Mar 2003
- Location
- Brookfield
- Posts
- 3,563
It is like DaJaVue!

So did Tom weld the braces on the air-to-water, or did it come that way?
-
05-19-2009, 06:57 PM #3Pumpgas Streetcar
- Join Date
- Feb 2005
- Posts
- 2,033
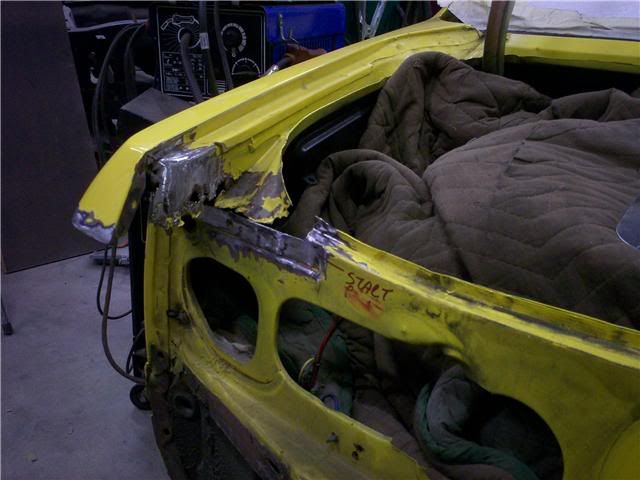
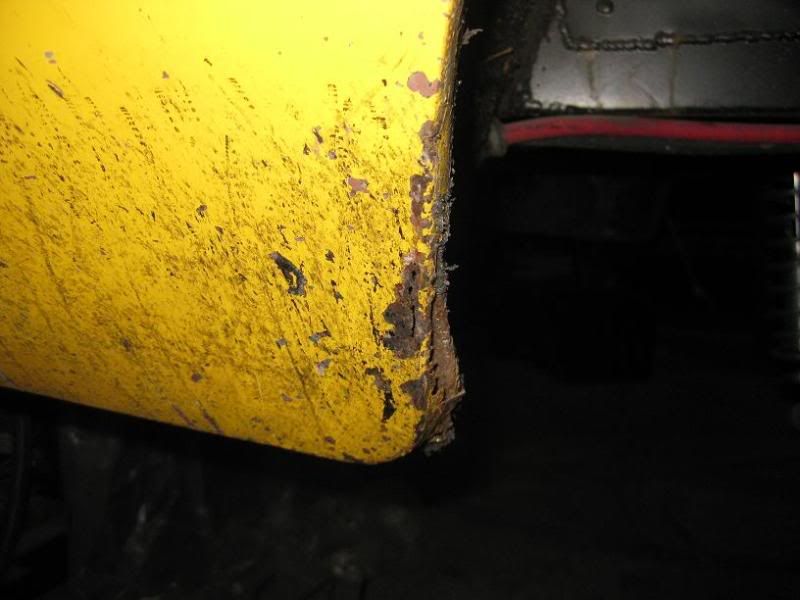
So! Seeing as how these projects never end, lol, the car is back at OTE for some body work! The previous owner repainted the car and had his own technique for body prep which now is all going to get undone. Now the pics I am showing are the worst of the worst, the car is actually pretty clean for an original '79 chassis.
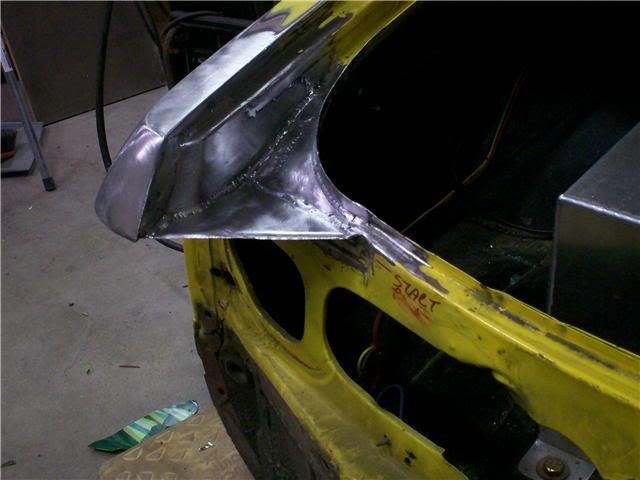
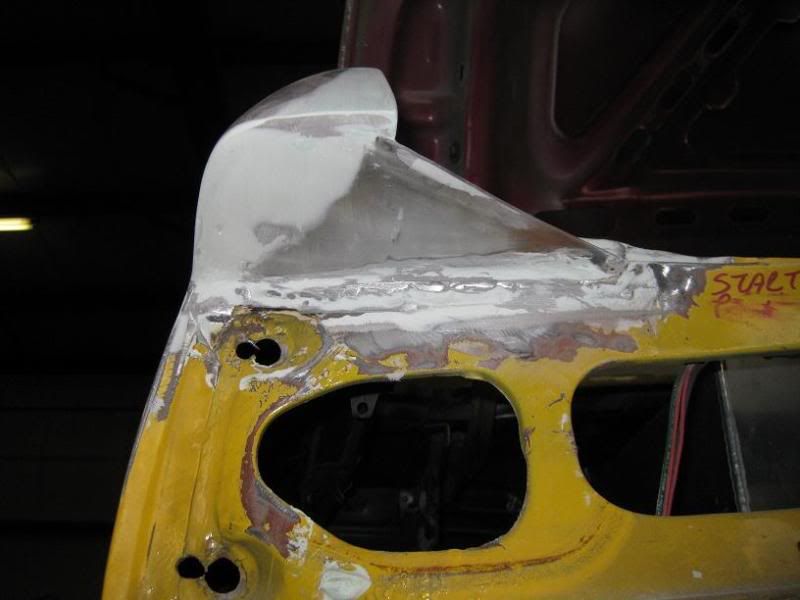
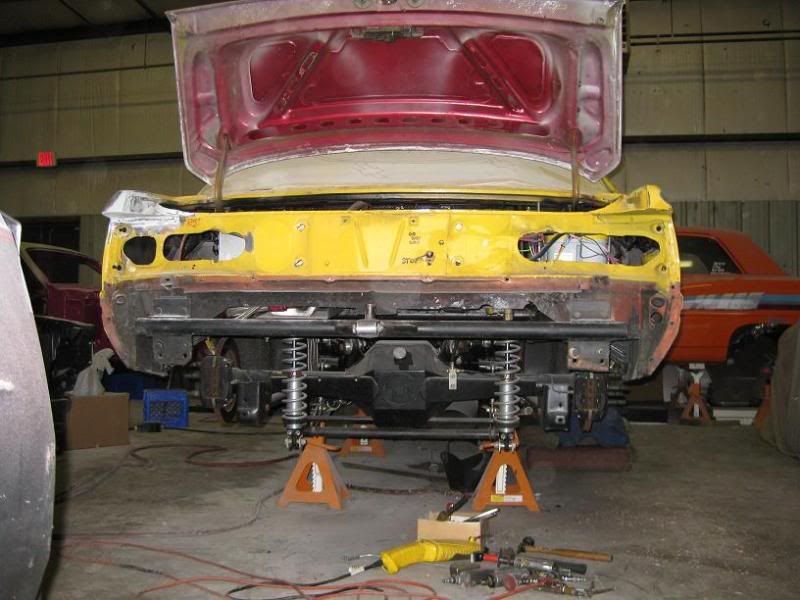
The first part that had to be addressed was the drivers side corner of the trunk. For some odd reason that spot decided it wanted to rot out, so a new corner had to be fabbed in. Funny thing is, the passenger side is flawless. Although now the new side looks better than the factory side, lol.
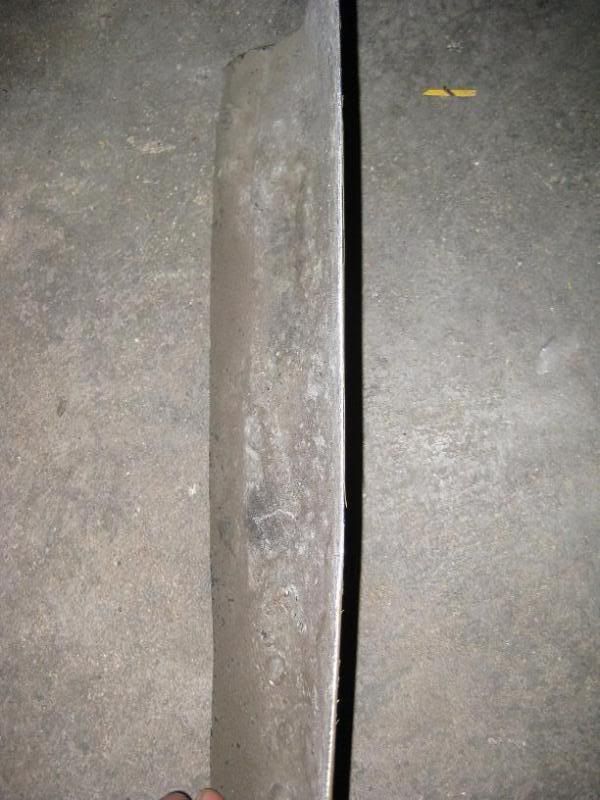
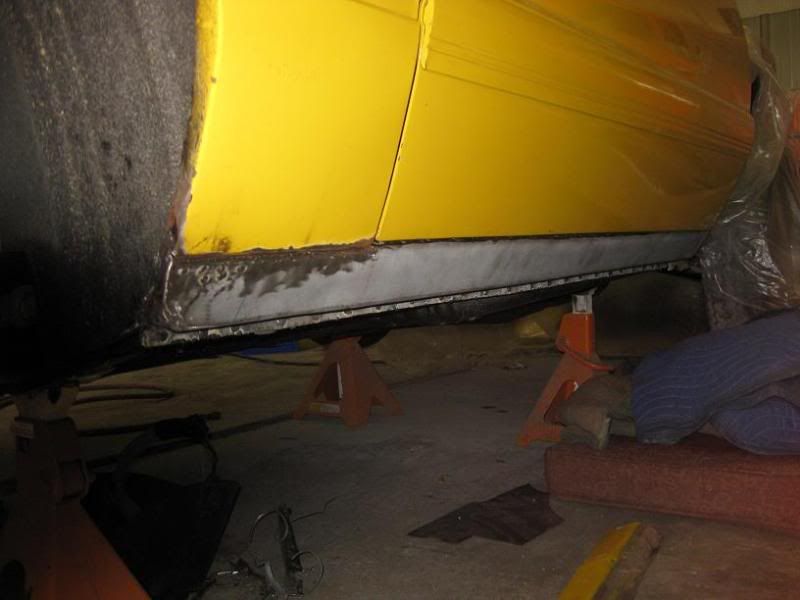
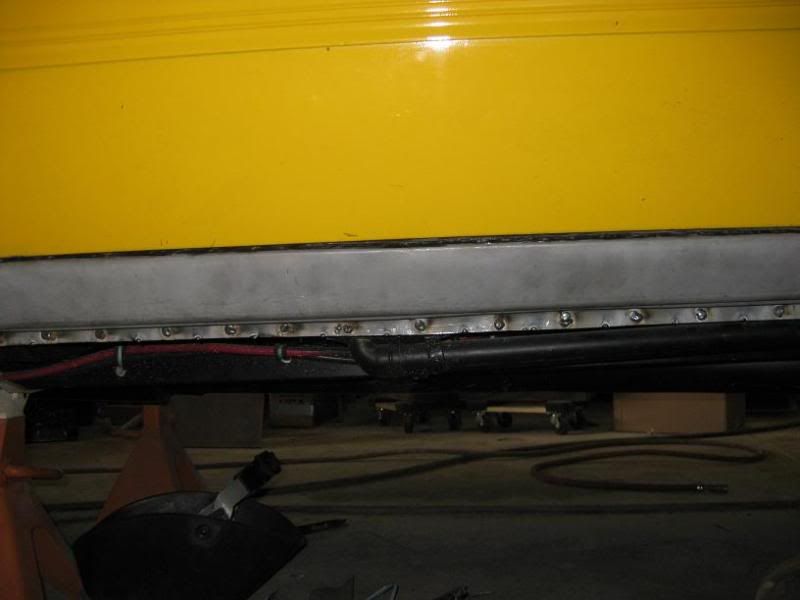
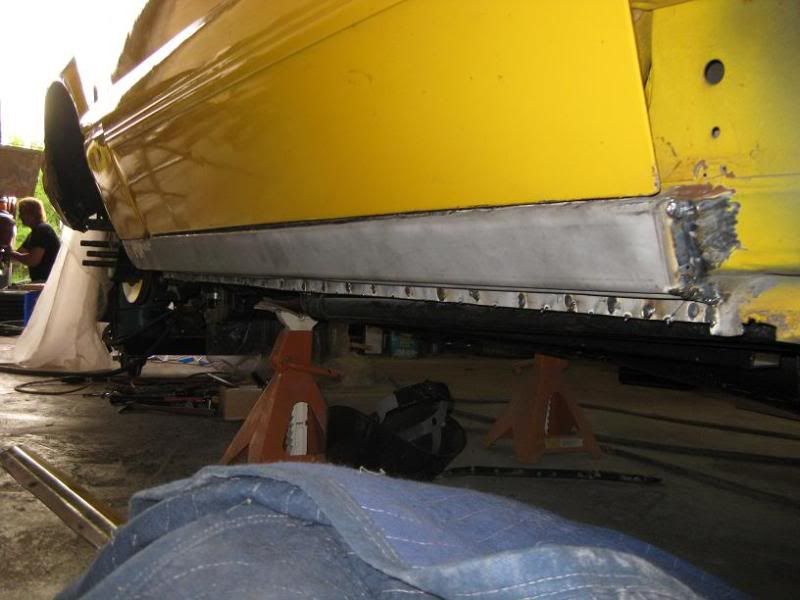
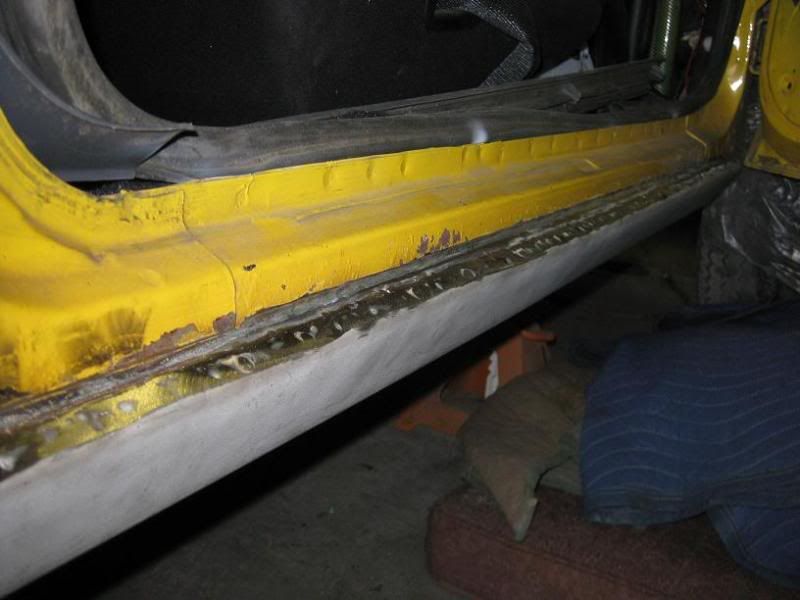
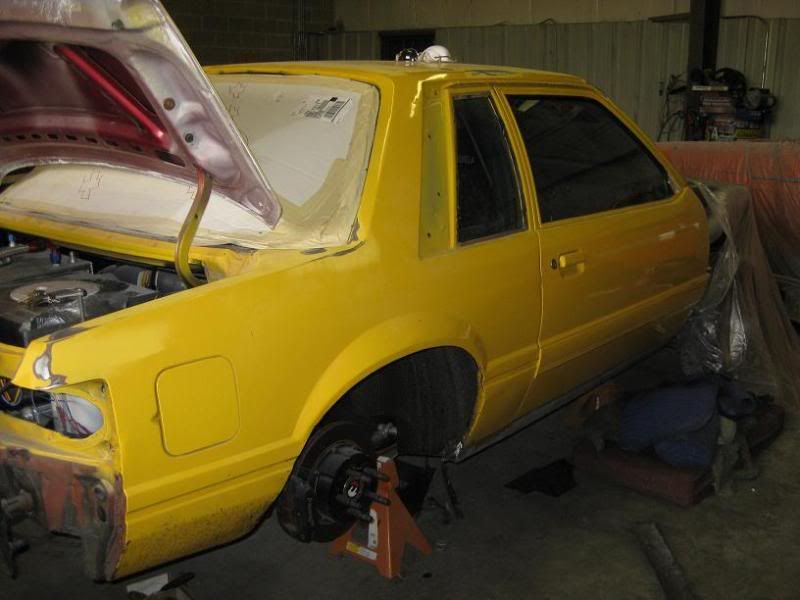
The next part that had to be taken care of was the passenger side rocker panel. The only reason we are replacing it is because at some point in its life it go smacked in by something, and the previous owner filled in the dent with a healthy serving of bondo.
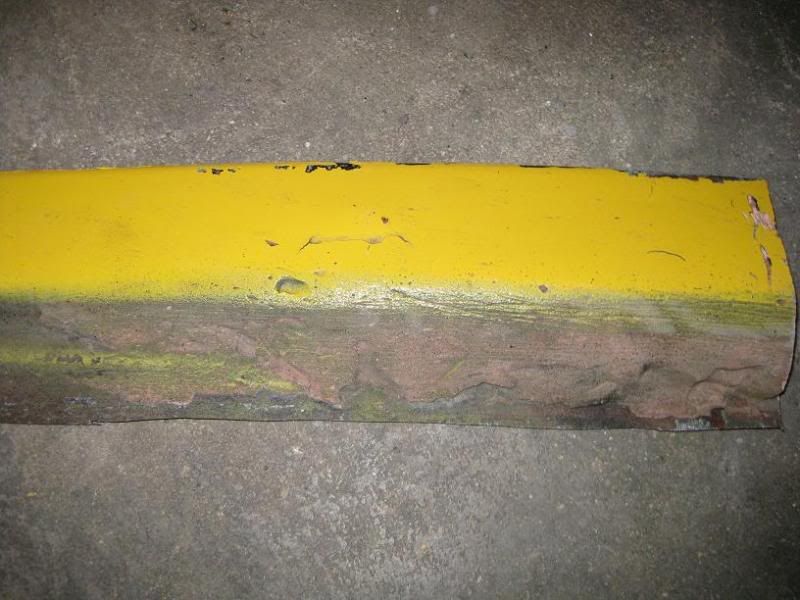
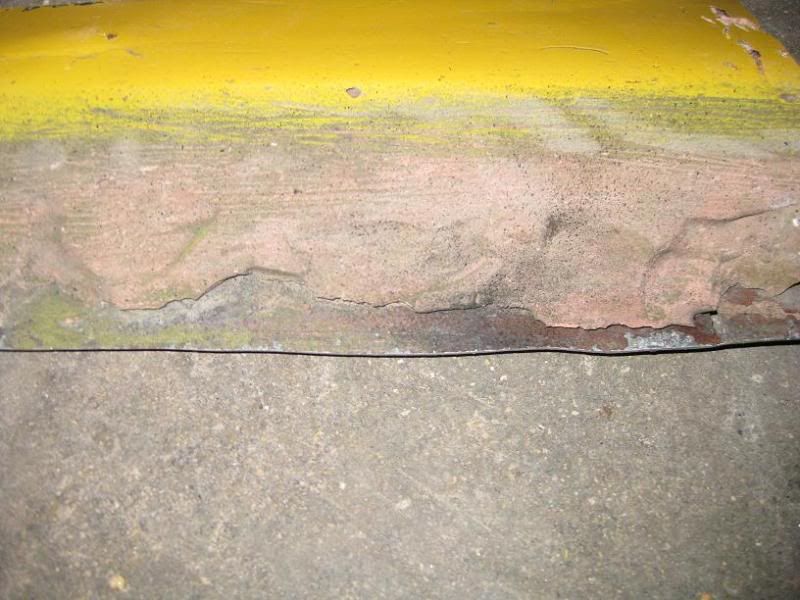
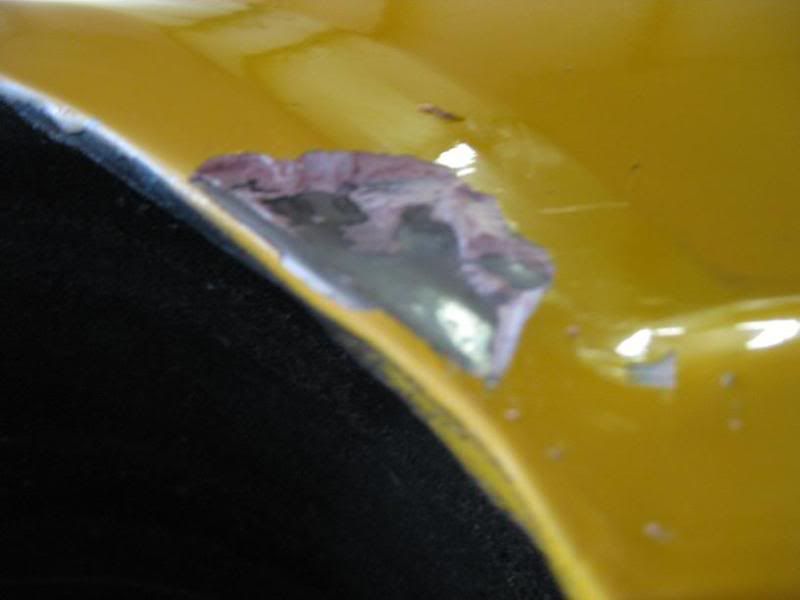
Here are just a few more examples of what needs to be taken car of. The first pick is of the passenger side rear quarter lip. It was dented in just like the rocker was and filled in with bondo.
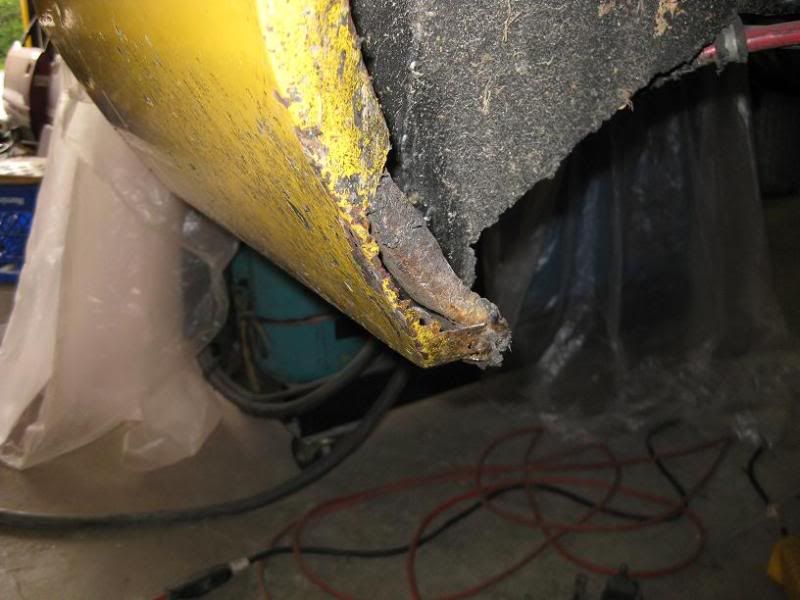
Lastly a little bit of an issue in the rear of the passenger side wheel opening.
I will keep updating this thread as the progress continues! It should be done by next weekend........................................... ...................... Just kidding Tom!
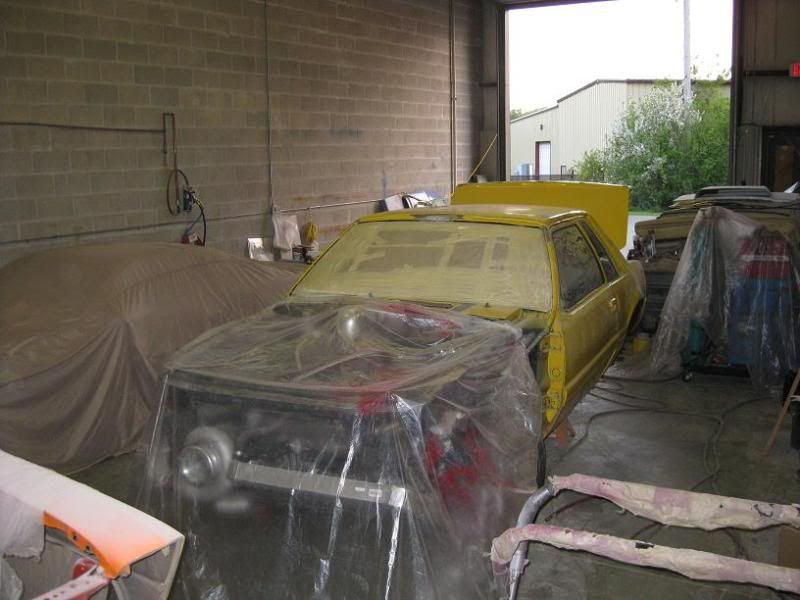
Here it is as it sits now!
-
05-19-2009, 07:02 PM #4Pumpgas Streetcar
- Join Date
- Feb 2005
- Posts
- 2,033
The braces were welded on by Chiseled Performance. Although I wish Tom was the one that welded them on because I would hate to get hit by a flying chunk of aluminum. Originally Posted by BOSS LX


Chiseled Performance's Friday afternoon or Monday morning welds.......
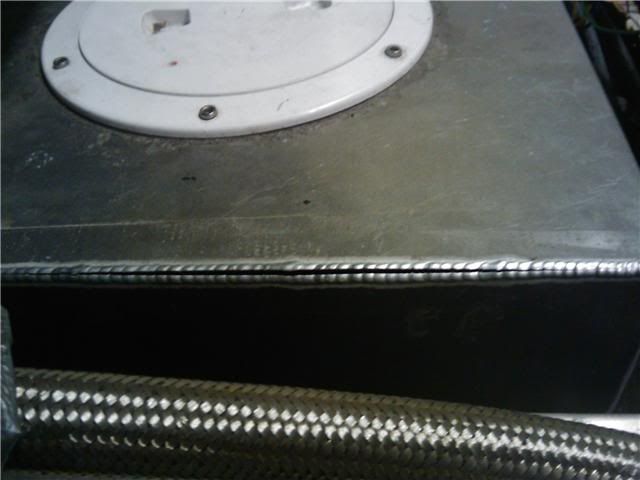

I do have to say they are going to send me a brand new one free of charge, so they do stand behind their products.
-
05-19-2009, 07:16 PM #5Fireworks And Storage

- Join Date
- Feb 2005
- Location
- Waukesha, Bonfire capital of BCM
- Posts
- 3,634
I remember when we hacked a hole in the hood for the first supercharger. Never thought this is where it would end up. Nice job on the car Tom does awesome work.
Owner of Sunset Self Storage LLC. LET ME KNOW IF YOU NEED STORAGE. 24/7 access. No Contract length. Self Storage/Portable Storage/Vehicle Transport
Thanks, Brad 262.751.9439
09 Cadillac CTS V Has some stuff done...
05 Chevy Duramax: Best time in 4wd was 12.22 @ 108
99 Harley Davidson Ultra Classic: Big Bore, Cams, tune.
-
05-19-2009, 08:05 PM #6Collecting parts!

- Join Date
- Nov 2005
- Location
- Over here
- Posts
- 7,375

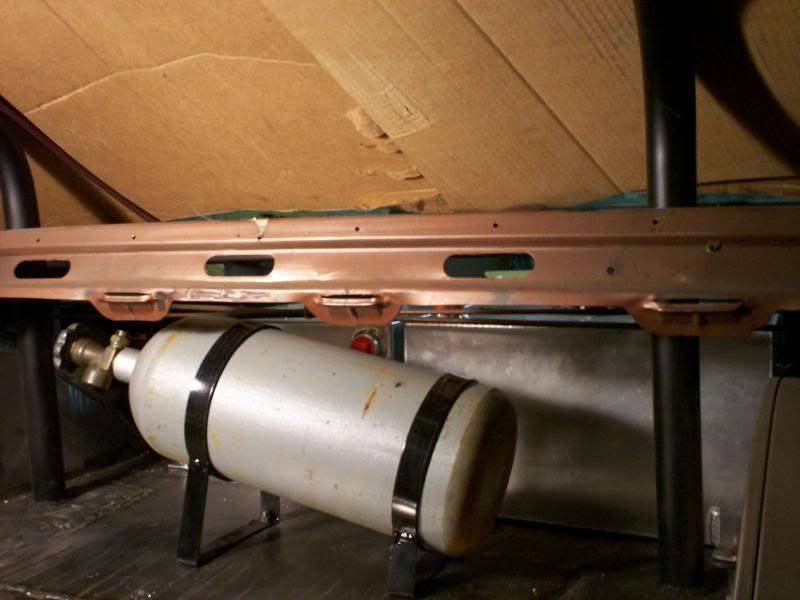
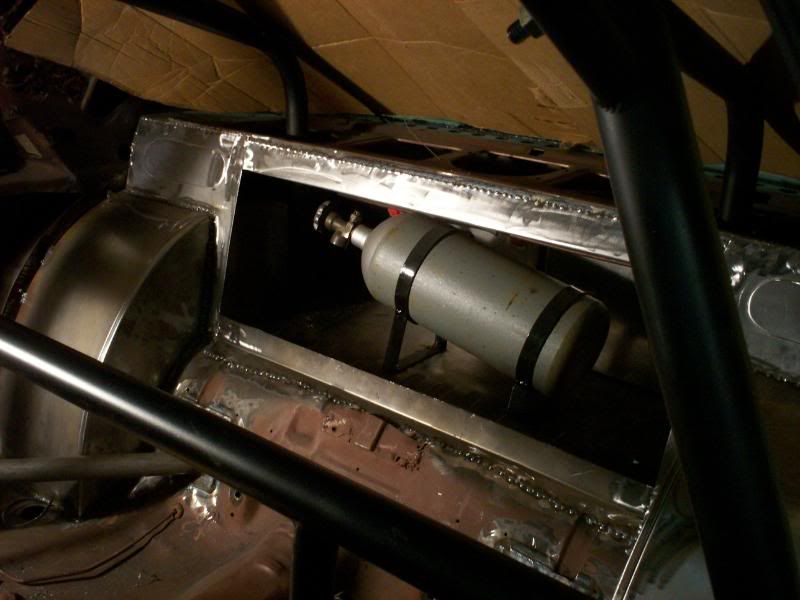
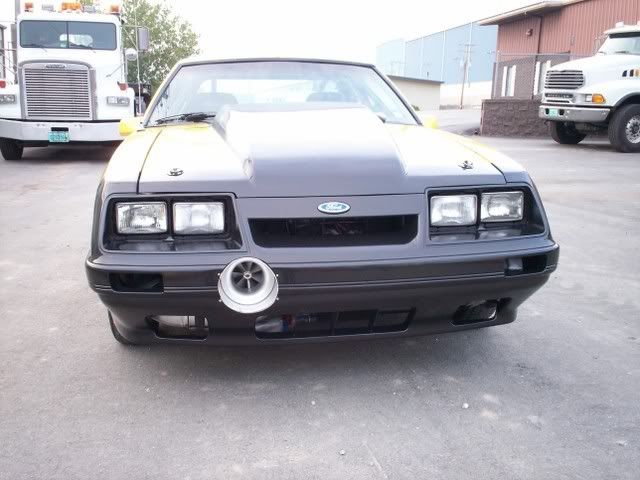
dudy, you have one bad ass car......It is awesome....Hell I remember before you started doing the project....I thought it was nice then. it is Nicer now..... That bottle that you had a pic of is that for fire supression or a little laughing gas to get you off the line before the turbos spool?
Originally Posted by HITMAN
Originally Posted by Cryptic

-
05-19-2009, 09:08 PM #7Pumpgas Streetcar
- Join Date
- Feb 2005
- Posts
- 2,033
Thanks! Originally Posted by Nutwaver
The bottle is for CO2. I use it instead of manifold pressure to operate the wastegate. Boost control is much more responsive with the CO2.
-
05-19-2009, 09:11 PM #8R.I.P. BCM


- Join Date
- Apr 2003
- Location
- Fort Knox, Kentucky
- Posts
- 13,175

That's an awesome ride!!!

One question the track in the third video, is that a down hill drag strip?All posts from the above author are expected to be 100% BS. Thank you and have a nice day.
-
05-19-2009, 09:15 PM #9Pumpgas Streetcar
- Join Date
- Feb 2005
- Posts
- 2,033
The S-trim setup was fun as hell! At that point the car had no interior in it, cheese grater tail lights, a GT wing on the trunk lid, and two air sawed holes in the hood for the blower and carb hat, lol. Man was it ugly! All I cared about back then was that it was fast and I could drive it. Originally Posted by UnderPSI
-
05-19-2009, 09:28 PM #10Pumpgas Streetcar
- Join Date
- Feb 2005
- Posts
- 2,033
I knew that question would come up! Originally Posted by GTSLOW
The drag strip is Byron Dragway in Illinois. When I asked Bob Kurgan, an NMRA/NMCA and now True Street racer, this is what he gave me.
http://home.comcast.net/~gnxs/byrond...elevations.pdf
If you zoom in you can actually read all the elevations for each point he gives in the pics.
He told me it is an optical illusion and that his fastest times have not been at that track. Whether it is or it isn't hasn't really bothered me, because on a crappy pass at GLD I rolled through the beams to an 8.90 @ 148mph. That day at Byron was the first time I had ever gotten to make a FULL pass with the car.Last edited by FourEyedFord; 05-19-2009 at 09:32 PM.
-
05-19-2009, 10:23 PM #11you smell coolant?

- Join Date
- May 2006
- Location
- Oconomowoc, WI
- Posts
- 1,549
very nice craftsmanship on the piping and such, thats a very nice car bobby OTE did an amazing job
-Kyle
2006 F350 6.0 CCLB DRW LariatGearhead, Holders Diesel, Retro Solutions, Pure Diesel Power, Screamin Eagle, Spyder Industries, Recon, Dirty Diesels
KCCO!
-
05-19-2009, 10:45 PM #12Just some slow stock shit!

- Join Date
- Jun 2006
- Location
- Greenfield
- Posts
- 3,501
Looks good Bobby and good work Tom! Also I see Doc Daves Nova in the backround!
01 Camaro SS - Daily
90 Mustang Lx - Daily #2
4-0 on the street for 2010!
-
05-19-2009, 11:51 PM #13????

- Join Date
- Dec 2004
- Posts
- 293
Hey Bobby, you must be one of those deep pocket guys.
Bobby is proof that if you wanted it bad enough, you'll find a way. 
-
05-20-2009, 07:59 AM #14Post whore

- Join Date
- Aug 2002
- Location
- Milwaukee, WI
- Posts
- 524
Yeh, I am not going the same direction as Bobby, but look for some build pics later this summer. Originally Posted by scaleracer
67 Chevy II in a million pieces :: My Blog
-
05-20-2009, 09:47 AM #15you would think so but the track is flat, after the traps it goes UP giving it the downhill illusion Originally Posted by GTSLOW
2002 dodge cummins - mechanically injected, stupid built.. never ending project
2013 Toyota Tacoma - crewcab, v6, 6 spd, 4wd, TRD package
-
05-20-2009, 10:03 AM #16 Originally Posted by FourEyedFord
 should have continued to read instead of replying as soon as i seen that.
 2002 dodge cummins - mechanically injected, stupid built.. never ending project
2013 Toyota Tacoma - crewcab, v6, 6 spd, 4wd, TRD package
-
05-20-2009, 12:17 PM #17Single D's

- Join Date
- Mar 2005
- Posts
- 388
Bobby your car has come a LONG way since we got into this. It's funny to see pictures of your car with the 393 and that K&N air cleaner hanging out of the hood! I really can't wait to see how the car is going to look after the paint! I love the pictures its fun to see a build come together like this. Keep 'em coming!
-
05-20-2009, 12:53 PM #18IrishGuest
Tom ='s a metal Da Vinci!
-
05-20-2009, 03:47 PM #19Just some slow stock shit!
- Join Date
- Jun 2006
- Location
- Greenfield
- Posts
- 3,501
Alright sounds good! I was suprised since I haven't seen it in years.. Originally Posted by DocDave
01 Camaro SS - Daily
90 Mustang Lx - Daily #2
4-0 on the street for 2010!
-
05-20-2009, 06:30 PM #20Post whore
- Join Date
- Mar 2006
- Posts
- 1,519
Cool thread Bobby, Tommy (and you) did a great a great job on it!
Tom does great work and I will send anyone I can to him. He always took care of me and the locals, staying late for us who needed things last minute or repaired.
I loved the cage he did in my Turbo Notch and the other chassis work he did for me over the years! Nice writeup


 2005 CHEVROLET 3/4 TON
 2006 FORD F-250 SUPER DUTY 3/4 TON
 1996 FORD F-250
 2002 DODGE 2500